

Owncloud is among the best things the open-source communities have produced. This guide will have detailed instructions for installing Owncloud 9 to Synology NAS device with DSM 6.
Some prewords:
- At the time of this guide, DSM 6 is release candidate (rc) version
- This is fresh install – no upgrade from existing owncloud version. If you are planning to do upgrade, please see my other blog post about Owncloud upgrade procedure and the things you should consider when doing the upgrade.
- DSM 6 allows sudo to other users (root, http) in ssh terminal (with NAS admin password), it just makes many things easier (thanks Synology!)
- I will be installing owncloud manually, so no synocommunity packages or install procedure is used
- It is possible to install Redis server and php extension php-redis to your Synology NAS, in order to support file locking in owncloud. Please see my other blog post for installing phpredis into Synology NAS.
- I’m assuming that you have enabled web station, SSH, installed PHP and Mariadb/phpMyAdmin and know what is Apache – in your Synology NAS. I’m also using scripts to automate permission assignments in SSH terminal sessions.
- If you haven’t hosted any websites in your NAS earlier, please enable webstation package and test that PHP websites are working in your setup – through WAN 0r LAN, depending what are your plans on owncloud usage. As minimum requirement use phpinfo() or similar PHP powered web page before jumping into Owncloud installation. This ensures you have your firewalls, web servers, virtual hosts etc. configured correctly.
- My web root in this example is located in: /volume1/web/
- If you have it in different location, please modify any scripts or examples given here accordingly.
Ok -let’s get started with the installation.
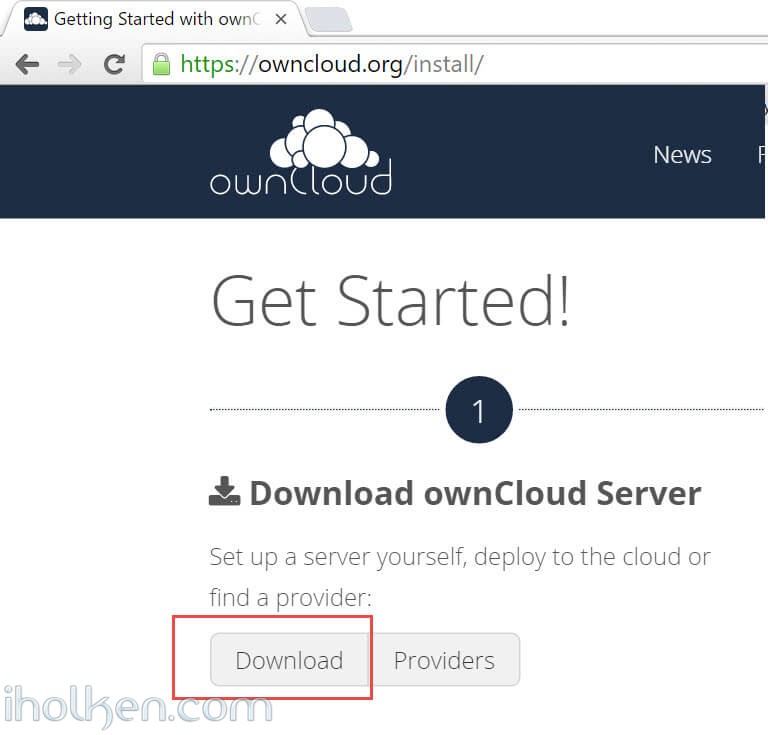
1) Download the latest stable ZIP file from owncloud.org (https://owncloud.org/install/) and copy extracted Owncloud folder to your Synology web root.
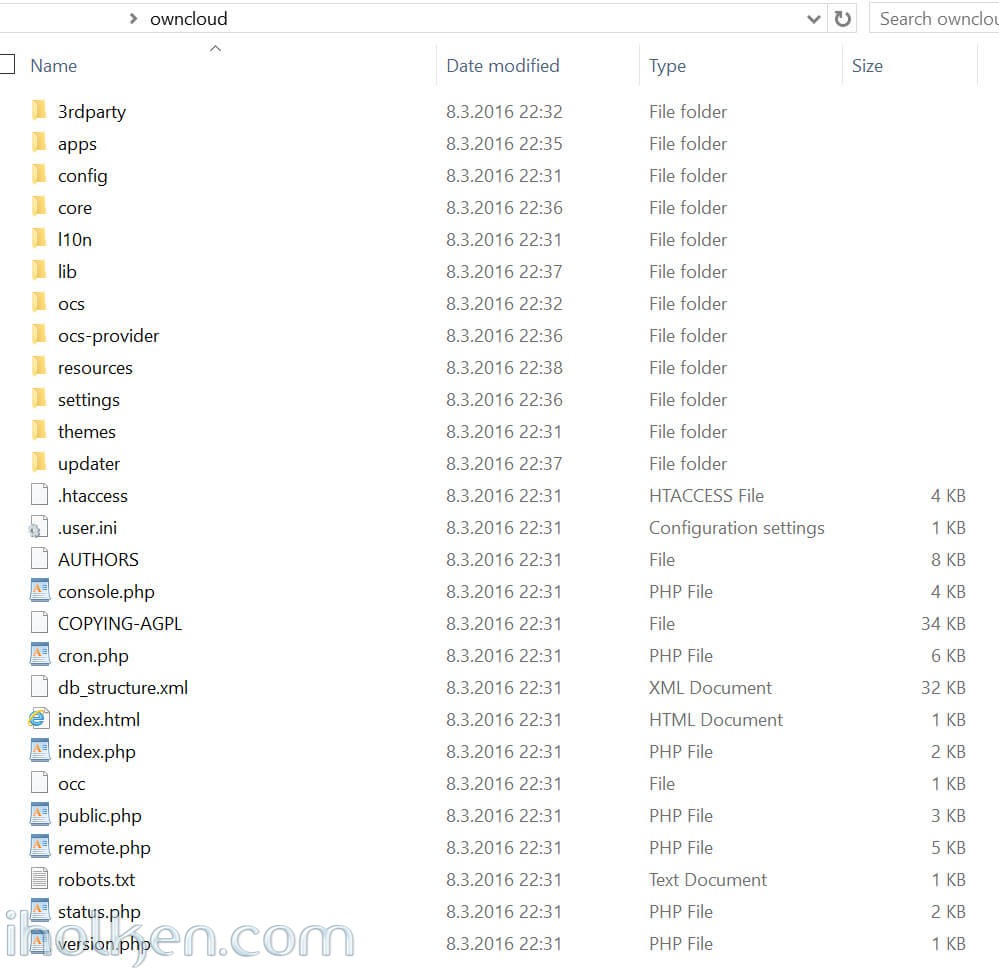
And here is the folder structure how it should look in ‘/web/owncloud/’:
 2) Create empty owncloud data folder outside web folder, as recommended by Owncloud community (I created it at: /volume1/owncloud/)
Note: If you decide to take this recommendation and setup your Owncloud data folder outside the web folder (makes upgrades, backups etc. easier) – you have to make some additional configurations to your PHP settings in Synology admin UI. However – these changes are valid only if you want to access your Owncloud through Synology hosts from the WAN side.
There are 2 options to make the change required (otherwise php/Owncloud instance cannot access your data folder outside web folder):
Option a)
Append your PHP open_basedir configuration with the location of your Owncloud data folder (IF outside web folder): ‘:/volume1/owncloud’
(Note: Do not delete any existing paths, add it to the end of the existing configuration – see screenshot)
Synology Admin UI -> Main Menu -> Web Station -> PHP Settings ->
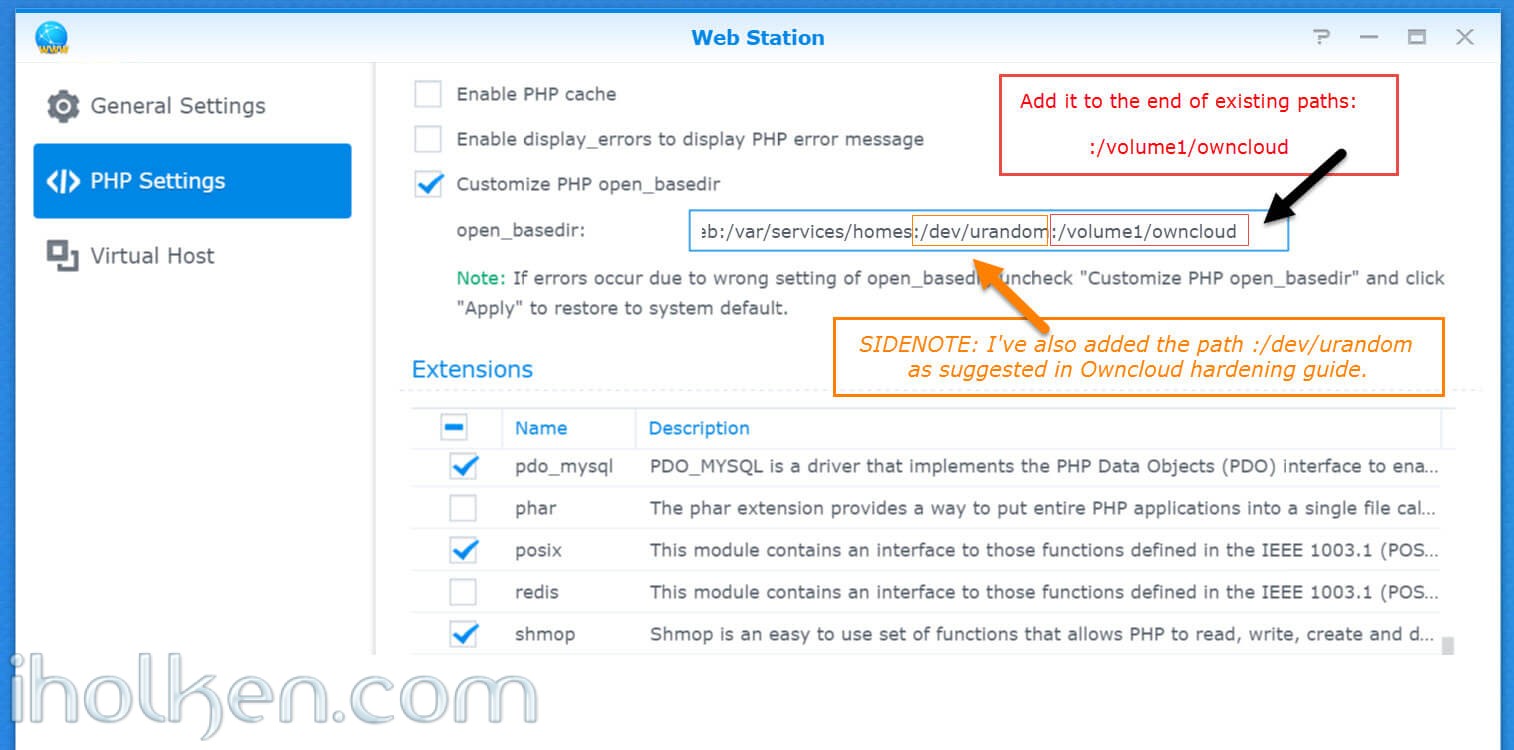
If you choose option a – it is highly recommended in Owncloud hardening guide to update path [/dev/urandom] there also, see for the example in the provided screenshot above. Based on my personal experience, I’ve also disabled PHP cache here and I’m using Redis server for Owncloud caching.
OwnCloud uses a RFC 4086 (“Randomness Requirements for Security”) compliant mixer to generate cryptographically secure pseudo-random numbers. The random number generation also tries to request random numbers from /dev/urandom, thus it is highly recommended to configure your setup in such a way that PHP is able to read random data from it.
Option b)
Clear the whole open_basedir input box, and while keeping the customize option still checked, apply changes. This will disable global PHP open_basedir execution restrictions completely. You can still assign any site/host specific open_basedir restrictions using the .user.ini files approach in docroot folders for every host required.
This option b where open_basedir is disabled for Owncloud – is actually the recommended approach by Owncloud documentation if Owncloud is running in 32bit environment.
3) Assign following permissions to folders for installation purposes. I run it using a script (.sh) file (remember to execute from system root!), with following contents:
1 2 3 4 5 6 7 8 9 10 11 12 13 14 15 16 |
#!/bin/bash chown -R http:http /volume1/web/owncloud/ chown -R http:http /volume1/web/owncloud/apps/ chown -R http:http /volume1/web/owncloud/config/ chown -R http:http /volume1/web/owncloud/themes/ chown -R http:http /volume1/owncloud/ chown http:http /volume1/web/owncloud/.htaccess find /volume1/web/owncloud/ -type f -print0 | xargs -0 chmod 777 find /volume1/web/owncloud/ -type d -print0 | xargs -0 chmod 777 find /volume1/owncloud/ -type d -print0 | xargs -0 chmod 777 chmod 777 /volume1/web/owncloud/.htaccess |
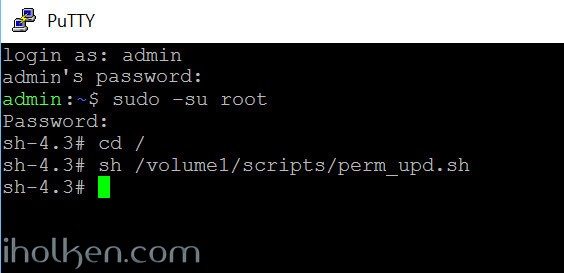
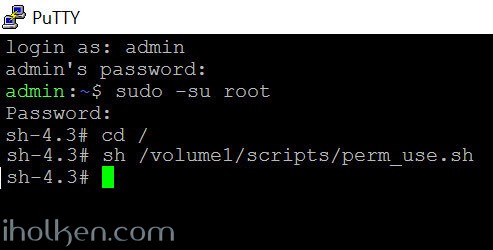
And I’m running it in SSH terminal like this (run it as root as it “can be done in DSM 6″ and from root folder in SSH terminal):
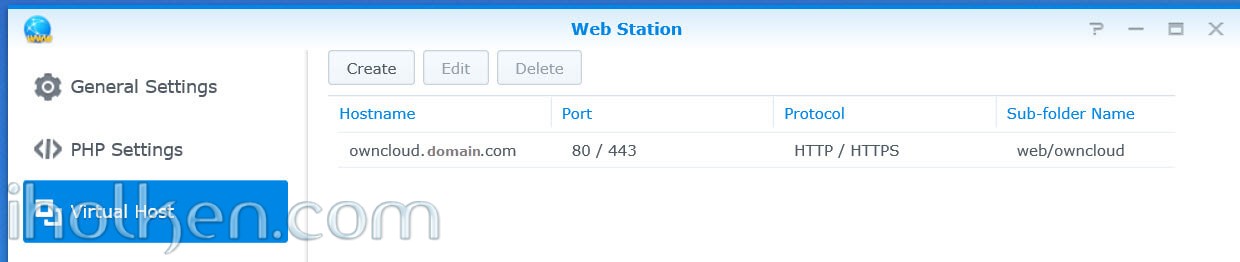
4) Enable Virtual host in NAS for the new owncloud folder in your web root.
I would highly recommend you choose Apache 2.2 as your webserver for your Owncloud virtual host. Mainly because it works out-of-the-box for most users in Owncloud / Synology NAS setup. Apache 2.4 has been reported not to work in recent comments received from users, and Nginx will require more configuration, especially the re-write rules might prove to be challenging (some users have reported 404 not found error after installation). So just choose Apache…!
5) Double check that you know your Mariadb/MySQL root password – you will need it during owncloud setup/installation.
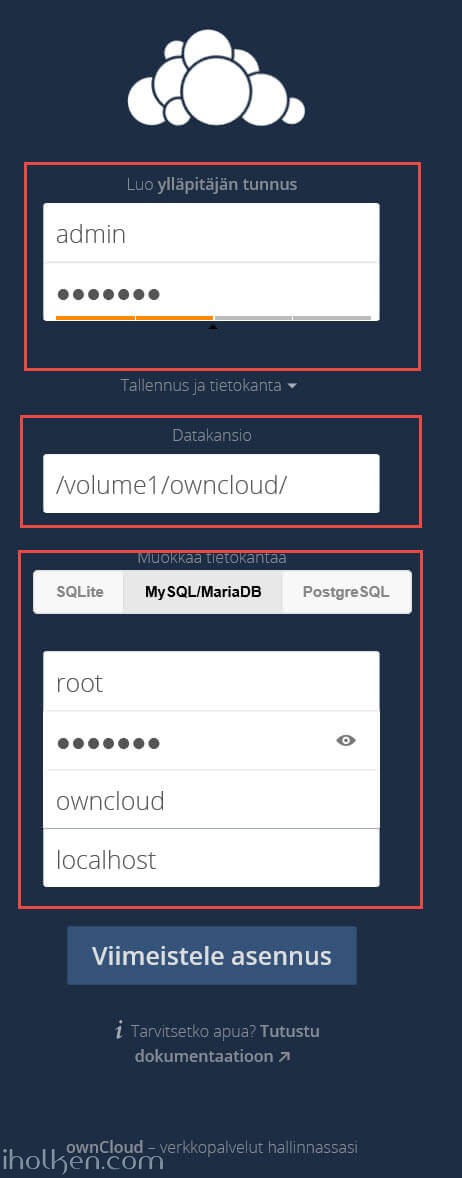
6) Point your Web browser to the newly created Owncloud website/portal – and finalize installation. Please use the web address that you want to use when using Owncloud, so that during installation your domain will be automatically added to allowed domains in Owncloud config.php file. Please give Admin password and give other details.
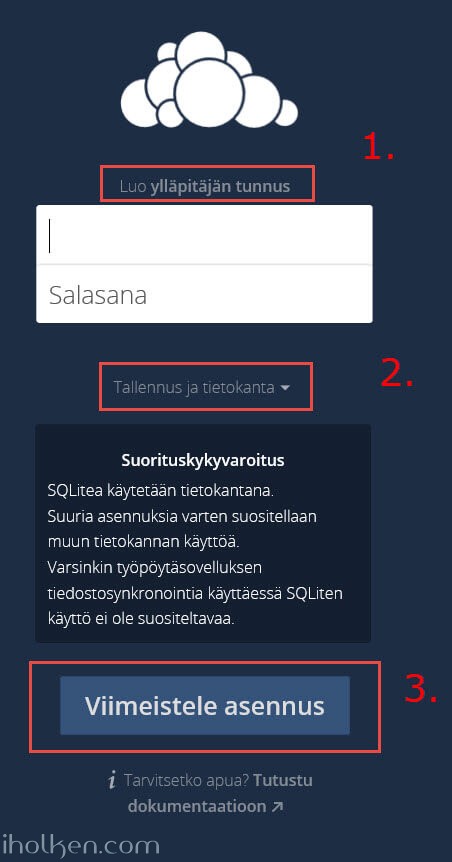 7) Give needed details for installing Owncloud. Highly recommended settings:
1. That you use MySQL/MariaDB – give database details needed
2. Define your Owncloud DATA folder to be outside the Web folder for Owncloud
 8) After installation the Owncloud web interface should open.
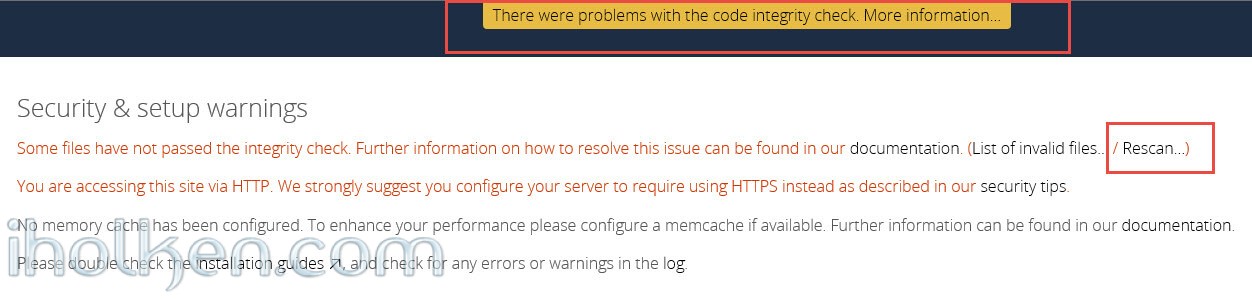
 If you see the error “There were problems with the code integrity check” – this is most likely because Synology creates @eadir cache folders everywhere. Removing these manually from Owncloud folders will remove the error. In this job you might find this code useful:
1 |
find . -name "@eaDir" -type d -print0 | xargs -0 rm -rf |
And here is example on how to use it:
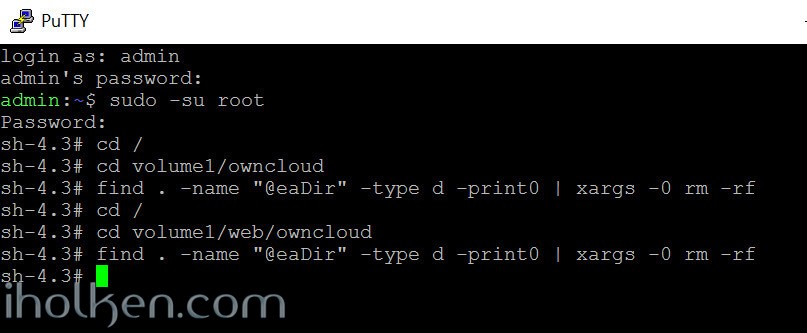
And you have now removed all ‘@eaDir’ folders from owncloud folders. And you should also be able to remove the error by Selecting ‘RESCAN’ on admin page of Owncloud.
 9) After installation you need to assign more strict folder permissions back for Owncloud folders. Please regard the given script as example only – always validate security permissions for your needs as required – and review related documentation from Owncloud.org for version 9.
I use a script (.sh) file, with following contents:
1 2 3 4 5 6 7 8 9 10 11 12 13 14 15 16 17 18 |
#!/bin/bash chown -R root:http /volume1/web/owncloud/ chown -R http:http /volume1/web/owncloud/apps/ chown -R http:http /volume1/web/owncloud/config/ chown -R http:http /volume1/web/owncloud/themes/ chown root:http /volume1/web/owncloud/.htaccess chown root:http /volume1/owncloud/.htaccess find /volume1/web/owncloud/ -type f -print0 | xargs -0 chmod 0640 find /volume1/owncloud/ -type f -print0 | xargs -0 chmod 0640 find /volume1/web/owncloud/ -type d -print0 | xargs -0 chmod 0750 find /volume1/owncloud/ -type d -print0 | xargs -0 chmod 0750 chmod 0644 /volume1/web/owncloud/.htaccess chmod 0644 /volume1/owncloud/.htaccess |
And I’m running it in SSH terminal like this (run it as root as it “can be done in DSM 6″ and from root folder in SSH terminal):
If you want to be able to edit the ‘max upload size’ section in Owncloud admin area, you might want to consider also having following permissions in place (upload size is overrided in hidden ‘.user.ini’ file in Owncloud root):
1 |
chown http:http /volume1/web/owncloud/.user.ini |
This makes the file writable by ‘http’ user, thus editable in Owncloud admin section.
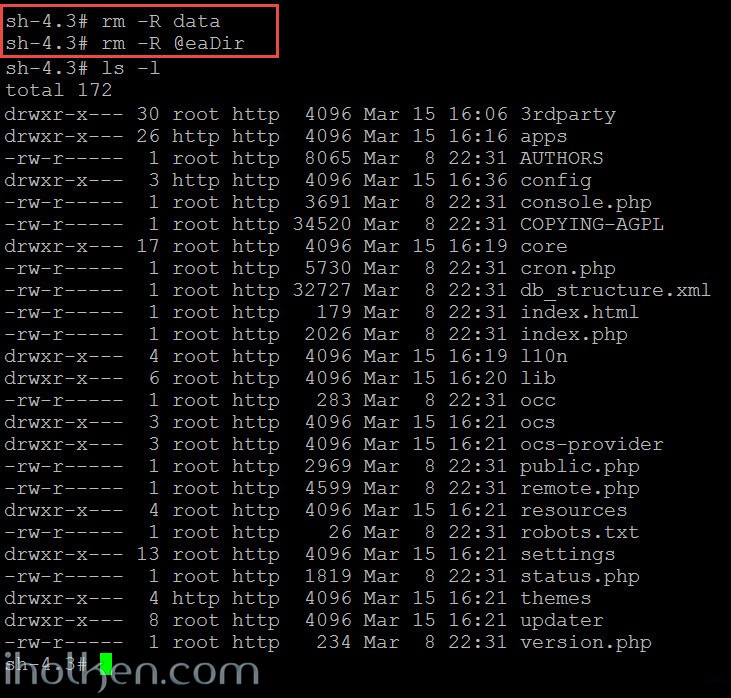
10) Double check that permissions got assigned correctly. You can also safely remove ‘data’ and ‘@eaDir’ folders inside ‘/web/owncloud/’ – they are not needed inside there if you created data folder outside the web folder as instructed:
 11) Done – You have successfully installed Owncloud 9 to your Synology NAS.
 Please follow closely Owncloud.org and Owncloud Github for further configuration, setup and any other topical issues. There are million things still to configure in your Owncloud setup including config.php modifications etc.
 Note: It is possible to install Redis server and php extension php-redis to your Synology NAS, in order to support Redis caching and file locking in owncloud. Please see my other blog post for installing phpredis into Synology NAS running DSM6 without bootstrapping. Also I have posted a guide on how to configure Owncloud to use system CRON in Synology NAS (DSM 6 RC).
(update 28.3 2016 – cleaned permission scripts and made addition about PHP open_basedir config required if data folder outside Owncloud web folder)
(update 13.6 2016 – Updated Apache as the preferred webserver for the virtual host configuration in Synology NAS. Mainly because Apache works out-of-the-box. Nginx actually requires more configuration – especially the re-write rules may cause headache and 404 not found -errors.)
(update 14.2 2017 – Updated Apache 2.2 as the preferred webserver version for the virtual host configuration in Synology NAS, due to multiple users reporting issues when using Apache 2.4 with latest Owncloud and DSM versions.)

Juha Ketola


Hi Juha,
Your virtual hostname is owncloud.domain.com. Am I right with my assumption that in Control Panel -> Network -> Servername is set to domain.com ?
Hi Oliver!
No. There are 2 aspects for this:
1) Internal DNS server
2) External DNS server
The domain.com should be the same, that you have mapped your server IP address into. It can be hosted internally in your LAN, if you have setup your own DNS server pointing into your server. OR it can be external – provided by your domain hosting server, if you are paying for some external provider for a domain name that is pointing to your server in the World Wide Web.
Virtual hosting itself means, that you can host more than one website in your server like this:
website1.domain.com
website2.domain.com
website3.domain.com
The [domain.com] part will point you to the server IP address in the network (internal or external like I described above), and the [website1] -prefix will be the virtual hosting part telling to your server which host you want to access (this is the virtual hosting, multiple sites under 1 IP).
Please familiarize yourself to domain names and host names, and how they relate to IP addresses, and continue from there what exactly is virtual hosting and how to do it. Even Synology might have more information in their tutorials how all this comes together.
I hope this helped you someway. This is one of those things that you just have to figure out yourself in order to really grasp it. 🙂
Take care!
/Juha
Hi
if you receive this errror after install (when choosing Option 2a)
/dev/urandom is not readable by PHP which is highly discouraged for security reasons. Further information can be found in our documentation.
You can fix this by appending
:/dev/urandom
to open_basedir
Owncloud.org manual
Maybe you should add this to the really really good guide! 😉
Cheers
Hi Alex,
I actually have mentioned this already in the screenshot for open_basedir configuration since the beginning of creating this guide…
But thanks for pointing this out still, there is never too much hardening done!
/Juha
Hi Juha,
you are right, I knew that I have read it somewhere – probably in your screenshot when I first read your guide. But then later I did a search for the string “urandom” and couldnt find it anymore (cause it is in the screenshot), so maybe putting it in the text might be helpful to find it easier.
Thanks!
Hi Alex!
Ok – good point. I will update it to the text as well!
Take care!
/Juha
…one more
If you want to have owncloud in https://serverfqdn/owncloud (like in the synocommunity package) just do not create the Virtual Host
@all: Do you see any security implications here? The only thing I can see so far is, that HSTS cant be enabled this way in DSM6, as this setting is only on the VirtualHost (other than DSM5x))
Hello, thank you for your guide. I wanted to upgrade to 9.1 OC, but I already have a great instance that must be updated via the command line. Give guidance on this process? Thank you very much.
@Juha: I installed it on my Test-NAS with 9.0.3. – as 9.0.4 (stable) has been released I wanted to test the update (now with owncloud installed directly – no need to wait for the synocommunity package to update *g*).
So I tried the most easiest way, by just clicking the “update” button within the admin gui, but then nothing happens. Have you experience with updating this installation you could possibly share?
Again Thanks.
Alex
Hi Alex,
I’ve just published new post about upgrading Owncloud in Synology NAS. There I have described how I usually upgrade my Owncloud instance. I hope it answers to your questions.
Thanks.
/Juha
Awesome! Thank you very much. I will give it a try and give feedback.
Cheers
Alex
Hi Psenda,
I’ve just published new post about upgrading Owncloud in Synology NAS. There I have described how I usually upgrade my Owncloud instance. I hope it answers to your questions.
Thanks.
/Juha
ERROR
The “Strict-Transport-Security” HTTP header is not configured to at least “15768000” seconds. For enhanced security we recommend enabling HSTS as described in our security tips.
=> Solution
Enable HTTP Strict Transport Security by setting the checkmark for HSTS when configuring the Virtual Host
@Juha: Maybe this could be a hint, when creating the Virtual Host.
Hi Alex,
True, but only if you have the certificate and https capability. HSTS is permanent by nature in browser, not sure if you don’t have certificate installed, can you still configure it into your virtual host? If you can, then site perhaps cannot be reached if browser requires https but server cannot provide it. So I have excluded that on purpose here.
I have though written a longish post about enabling https, where I also open up deeper the HSTS and also re-direct principles in general. It is tricky subject for someone not ‘into it’, so I decided it deserved an own post all together.
It is anyway the decision for everyone to make if mandatory https is something you need to do or not for your service. And if you have HSTS enabled, it is a real issue if you forget to renew your SSL certs…
/Juha
Dear Juha,
thanks a lot for this in depth explanation!
I got myself a Synology DS216j and installed ownCloud 9.1 without much trouble, eventhough I never worked with most of the software and systems used here. – I have some experience with Linux. I’m not sure why, but I didn’t get the script to run and therefore typed everything by hand. Everything else worked like a charm, just took quite some time. Especially the following was very helpful for me, because I did a clean install of the DSM without any apps:
“I’m assuming that you have enabled web station, SSH, installed PHP and Mariadb/phpMyAdmin and know what is Apache – in your Synology NAS. I’m also using scripts to automate permission assignments in SSH terminal sessions.”
There’s one last challenge for me which is encryption. Unfortunately Synology does not support full disk encryption (as far as I’m aware) and I’d like to add another layer of security. I used to encrypt my systems with truecrypt and might try to get that running on the NAS, so that for every restart I have to decrypt certain volumes/folders before I can use for example ownCloud. Any hints and infos regarding that would be appreciated.
Thanks again
Julius
Hi Julius,
Thanks for the feedback.
About the permissions scripts, there is 2 things that need to be in place. You need to be sudo root and you need to run those from system root location:
That should work, if your document paths match to mine.
What comes to encryption, AFAIK as well – no full encryption support for Synology. You could look into enabling encryption from within Owncloud itself, or separately to NAS shared folders… But other than that, I don’t think there is much new on that area.
/Juha
Hi Juha,
I found a solution that works well for me concerning the security of the ownCloud files. I installed veracrypt on the NAS and created a big encrypted volume. I then mounted it on /volume1/owncloud, copying all old files from the original owncloud folder. The volume needs to be mounted manually with a password after every startup of the NAS.
As soon as the NAS is shut down or without power, all files are encrypted. I am not sure if that’s easily doable with those shared folder and the encryption option. I anyway prefer a custom encryption tool and really liked using truecrypt in the past.
Cheers – Julius
Hi Julius,
Thanks – appreciated.
This is good stuff for anyone interested in different options to encrypt data in Synology device.
Take care!
/Juha
Hi Juha,
Thank you for this very thorough and detailed set of instructions. I installed an instance of ownCloud 9.0, and upgraded it to 9.1 on DSM 6, with no troubles.
Would any of your instructions change when installing Nextcloud 9.0.53?
What is your perspective on the ownCloud / Nextcloud fork?
Thank you for your help,
Jason
Hi Jason!
Thanks for the feedback and leaving a post – appreciated!
I have not myself used these instructions for Nextcloud.
But that been said – I have received feedback that these instructions in this guide work just fine for Nextcloud as well – and as per my understanding currently Nextcloud is pretty much drop-in substitute for Owncloud (for obvious reasons – as it is fork….) so there really isn’t a reason for it to not work.
This however is fully dependent on how long these 2 instances continue to be similar…….
Now – your question about perspective between Owncloud / Nextcloud – without knowing the exact reasons for Karlitschek’s exit, I personally DO NOT LIKE backstabbing or when company founders break and leave to establish another similar company, and possibly even spoil business opportunities for the previous instance of a company. If I do not see or hear valid reasoning, I must assume the reasons are mostly financial. Perhaps I’m conservative and old-fashioned, but hey – that’s just me.
So I’m sticking with Owncloud myself – and my instructions are mostly about Owncloud.
/Juha
Hi, thanks a lot for this tutorial.
However, I’m stuck at number 6 as I’m unable to launch owncloud via the browser.
I’m typing http://localip/owncloud and I get a blank page with the message “No input file specified.”
I tried to search for similar problem but i couldn’t find a suitable solution.
Any idea please?
Thanks in advance for your help.
Some slight improvement by cheating: At point number 2, you advise to write /volume1/owncloud in the php settings. If I change that to /volume1/web/owncloud, it works but then I get stuck at point number 7 as it says “can’t create or write into the data directory /volume1/owncloud…
Hi,
Please double check all the steps in the guide….
It seems that you have more than one deviation from the guide.
1) It seems you have not defined your data folder to be outside web folder, as I instructed in my guide. If you would have – there would exist the folder /volume1/owncloud, and you do need to give php read permission to that folder.
2) if you get the error no input file specified when trying to open web page, then it seems that your web server cannot serve correctly browser with the correct files. Either due to issues with paths, or permissions….
Considering the issues you have faced, it seems you have failed to follow the steps on this guide – and it is pretty much impossible to give you a proper solution for your issues. You have now a custom installation for some parts. And you need to modify the permission scripts and commands for your case.
Either figure it out – or start the guide from scratch. As this guide will work –> if you just follow steps in details and with care. There are hundreds of proven cases…. 😏
Hi Juha,
Thanks for your reply. I’m not sure why you said I deviated when I just followed what I understood.
Anyway I found the solution and you will see why I couldn’t see it.
1) extracted OC 9.1 in /volume1/web/owncloud
2) created owncloud folder via shared folder in DSM to be at /volume1/owncloud
2a) Custom php settings in web station :/dev/urandom :/volume1/owncloud
3) Logged as root using sudo -su root, each permission applied one by one manually
4) Virtual host pointing to my synology DDNS hostname, http & https with custom ports, apache 2.2, php 5.6
5) yes i have the password
6) “No input file specified.” error when loading http://local-ip/owncloud
Solution: I had to go over 2b) and clear the open_basedir box. Somehow it wasn’t default before. After I reset it, I added :/dev/urandom :/volume1/owncloud and it was fine.
This was only mentioned in your section 2b, not 2a so I just didn’t execute 2b at all after completing 2a.
Else, I’ve got 2 warnings in the admin section
/dev/urandom is not readable by PHP which is highly discouraged for security reasons.
No memory cache has been configured. To enhance your performance please configure a memcache if available.
Many thanks for your help.
Hi,
Ok – that opens up the scenario a bit more. If you have customized open_basedir enabled, and paths defined on allowed list(but not ALL required paths)- php sites will not work in your webserver. That is why I in the introduction section require testing that .php sites will open in your webserver. That confirms the existing open_basedir configuration. However there is one scenario on the gray area, where it is empty when started – and that is why I try to emphasize the ‘APPEND’ part in option a. So there should be paths already if you append there paths….
But I’m glad you sorted it out.
What comes to the admin section notifications you got:
1)
dev/urandom should be accessible by correctly adding the path to open_basedir configuration, if not -> double check permissions for the dev/urandom itself – if I remember right by default the UDEV rules should allow execution…
2)
For the memory cache, highly recommended. You need to enable and configure it for yourself. I do have one post about enabling Redis cache and PHP redis module – that is one way to enabling caching.
Good luck with your setup – take care!
/Juha
Hi Juha,
Thanks a bunch for this very helpful walk-through. Unbelievable that it’s nowadays possible to set up a webserver, database engine and fully functional cloud on a computer with a few clicks, some scripts and about an hour of messing around. Your instructions were essential to this, thank you very much!
Best regards from The Netherlands
Hi Roger!
Thank you for the compliments!!!
Every feedback I receive is a satisfying reward for publishing these guides – appreciated a lot!
And indeed – the capabilities that one can setup with your own HW is amazing, and the effort/gain ratio is definitely in our favor!
Take care!
/Juha