

Owncloud is among the best things the open-source communities have produced. This guide will have detailed instructions for installing Owncloud 9 to Synology NAS device with DSM 6.
Some prewords:
- At the time of this guide, DSM 6 is release candidate (rc) version
- This is fresh install – no upgrade from existing owncloud version. If you are planning to do upgrade, please see my other blog post about Owncloud upgrade procedure and the things you should consider when doing the upgrade.
- DSM 6 allows sudo to other users (root, http) in ssh terminal (with NAS admin password), it just makes many things easier (thanks Synology!)
- I will be installing owncloud manually, so no synocommunity packages or install procedure is used
- It is possible to install Redis server and php extension php-redis to your Synology NAS, in order to support file locking in owncloud. Please see my other blog post for installing phpredis into Synology NAS.
- I’m assuming that you have enabled web station, SSH, installed PHP and Mariadb/phpMyAdmin and know what is Apache – in your Synology NAS. I’m also using scripts to automate permission assignments in SSH terminal sessions.
- If you haven’t hosted any websites in your NAS earlier, please enable webstation package and test that PHP websites are working in your setup – through WAN 0r LAN, depending what are your plans on owncloud usage. As minimum requirement use phpinfo() or similar PHP powered web page before jumping into Owncloud installation. This ensures you have your firewalls, web servers, virtual hosts etc. configured correctly.
- My web root in this example is located in: /volume1/web/
- If you have it in different location, please modify any scripts or examples given here accordingly.
Ok -let’s get started with the installation.
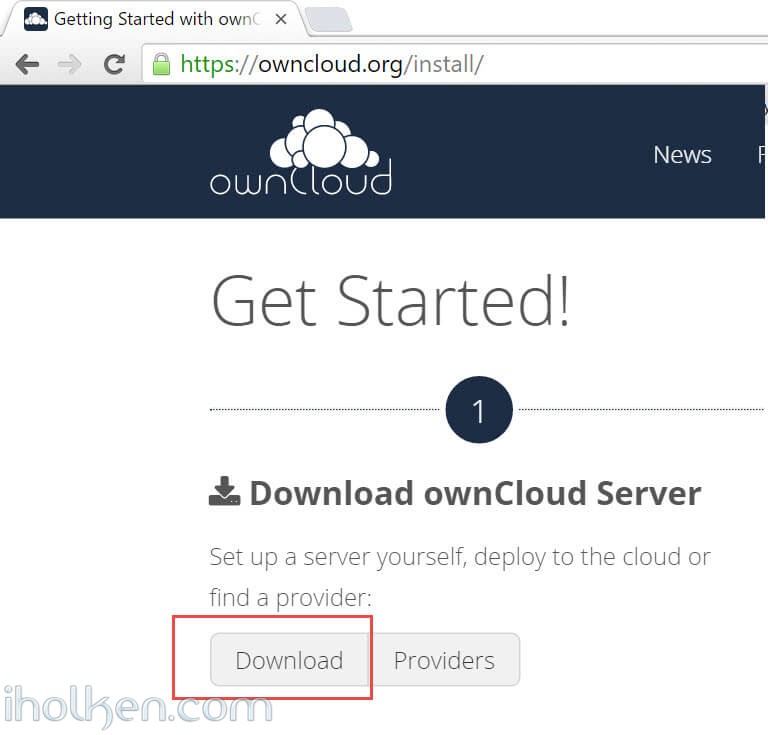
1) Download the latest stable ZIP file from owncloud.org (https://owncloud.org/install/) and copy extracted Owncloud folder to your Synology web root.
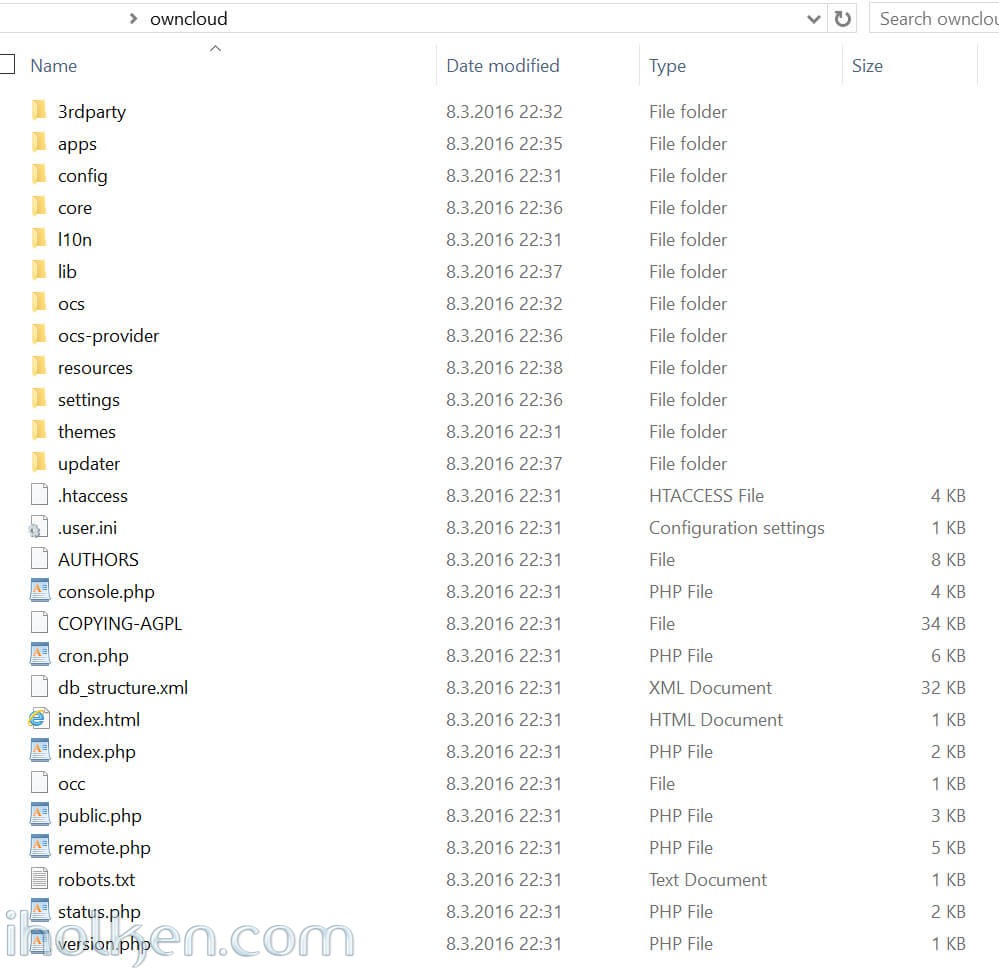
And here is the folder structure how it should look in ‘/web/owncloud/’:
 2) Create empty owncloud data folder outside web folder, as recommended by Owncloud community (I created it at: /volume1/owncloud/)
Note: If you decide to take this recommendation and setup your Owncloud data folder outside the web folder (makes upgrades, backups etc. easier) – you have to make some additional configurations to your PHP settings in Synology admin UI. However – these changes are valid only if you want to access your Owncloud through Synology hosts from the WAN side.
There are 2 options to make the change required (otherwise php/Owncloud instance cannot access your data folder outside web folder):
Option a)
Append your PHP open_basedir configuration with the location of your Owncloud data folder (IF outside web folder): ‘:/volume1/owncloud’
(Note: Do not delete any existing paths, add it to the end of the existing configuration – see screenshot)
Synology Admin UI -> Main Menu -> Web Station -> PHP Settings ->
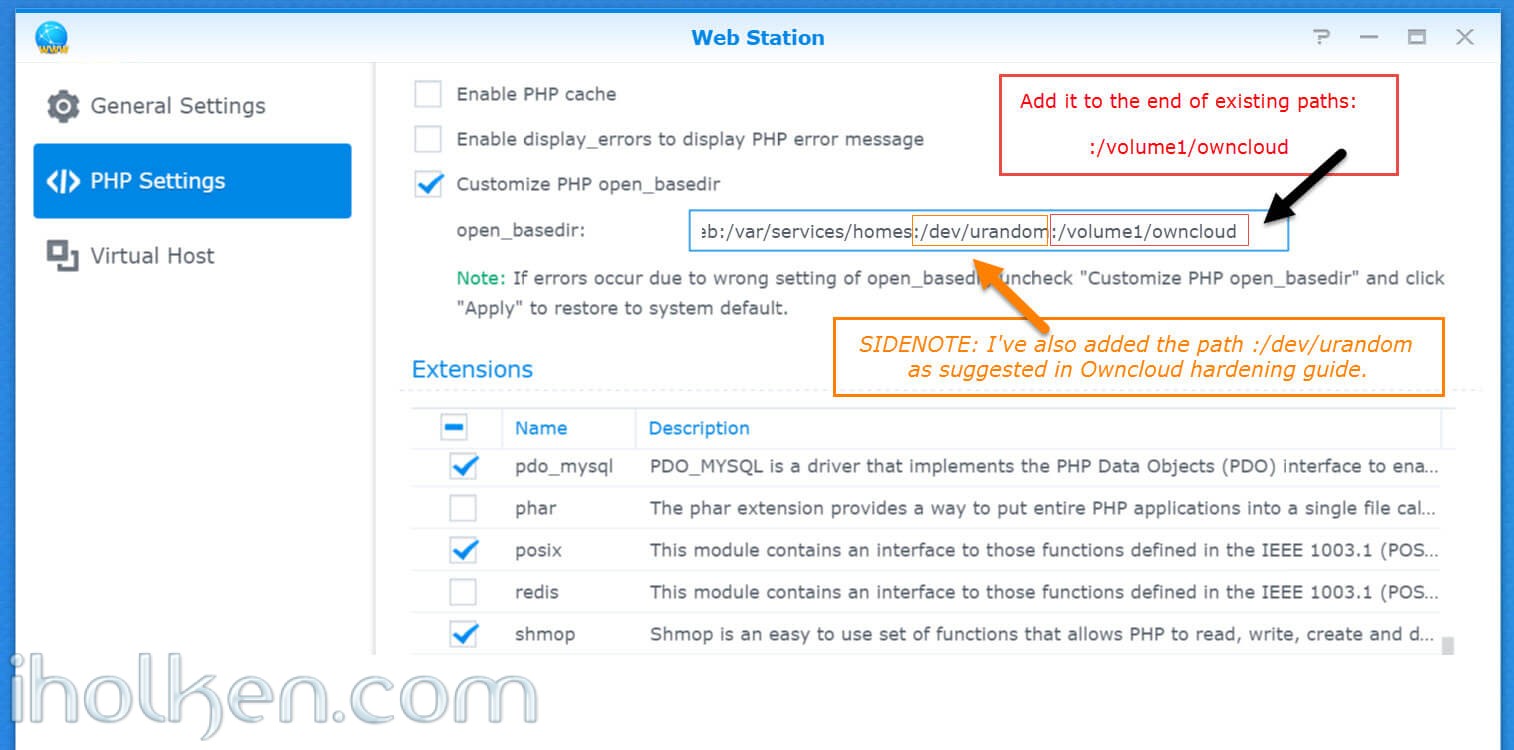
If you choose option a – it is highly recommended in Owncloud hardening guide to update path [/dev/urandom] there also, see for the example in the provided screenshot above. Based on my personal experience, I’ve also disabled PHP cache here and I’m using Redis server for Owncloud caching.
OwnCloud uses a RFC 4086 (“Randomness Requirements for Security”) compliant mixer to generate cryptographically secure pseudo-random numbers. The random number generation also tries to request random numbers from /dev/urandom, thus it is highly recommended to configure your setup in such a way that PHP is able to read random data from it.
Option b)
Clear the whole open_basedir input box, and while keeping the customize option still checked, apply changes. This will disable global PHP open_basedir execution restrictions completely. You can still assign any site/host specific open_basedir restrictions using the .user.ini files approach in docroot folders for every host required.
This option b where open_basedir is disabled for Owncloud – is actually the recommended approach by Owncloud documentation if Owncloud is running in 32bit environment.
3) Assign following permissions to folders for installation purposes. I run it using a script (.sh) file (remember to execute from system root!), with following contents:
1 2 3 4 5 6 7 8 9 10 11 12 13 14 15 16 |
#!/bin/bash chown -R http:http /volume1/web/owncloud/ chown -R http:http /volume1/web/owncloud/apps/ chown -R http:http /volume1/web/owncloud/config/ chown -R http:http /volume1/web/owncloud/themes/ chown -R http:http /volume1/owncloud/ chown http:http /volume1/web/owncloud/.htaccess find /volume1/web/owncloud/ -type f -print0 | xargs -0 chmod 777 find /volume1/web/owncloud/ -type d -print0 | xargs -0 chmod 777 find /volume1/owncloud/ -type d -print0 | xargs -0 chmod 777 chmod 777 /volume1/web/owncloud/.htaccess |
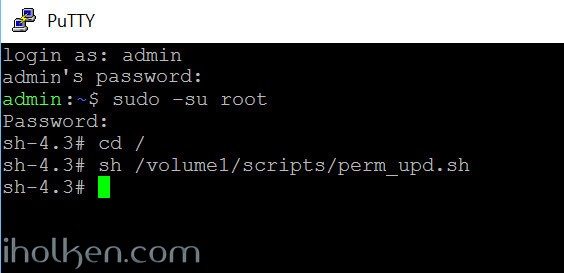
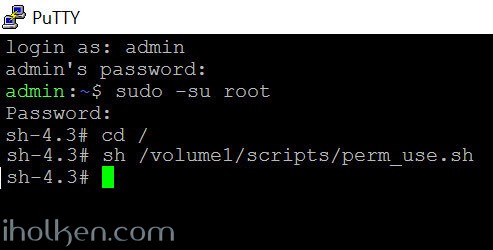
And I’m running it in SSH terminal like this (run it as root as it “can be done in DSM 6″ and from root folder in SSH terminal):
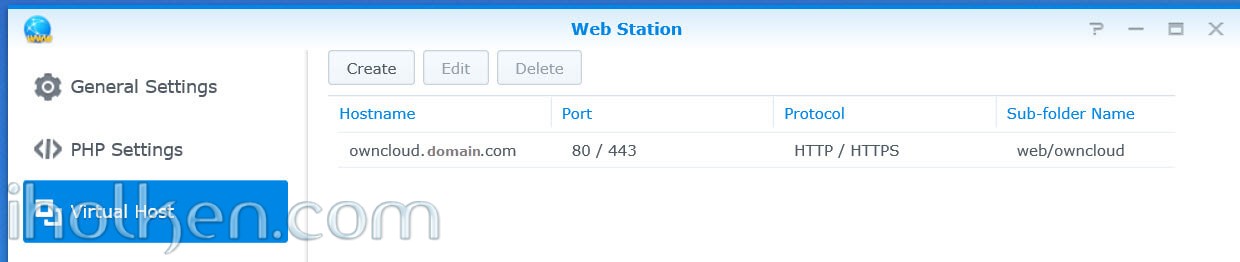
4) Enable Virtual host in NAS for the new owncloud folder in your web root.
I would highly recommend you choose Apache 2.2 as your webserver for your Owncloud virtual host. Mainly because it works out-of-the-box for most users in Owncloud / Synology NAS setup. Apache 2.4 has been reported not to work in recent comments received from users, and Nginx will require more configuration, especially the re-write rules might prove to be challenging (some users have reported 404 not found error after installation). So just choose Apache…!
5) Double check that you know your Mariadb/MySQL root password – you will need it during owncloud setup/installation.
6) Point your Web browser to the newly created Owncloud website/portal – and finalize installation. Please use the web address that you want to use when using Owncloud, so that during installation your domain will be automatically added to allowed domains in Owncloud config.php file. Please give Admin password and give other details.
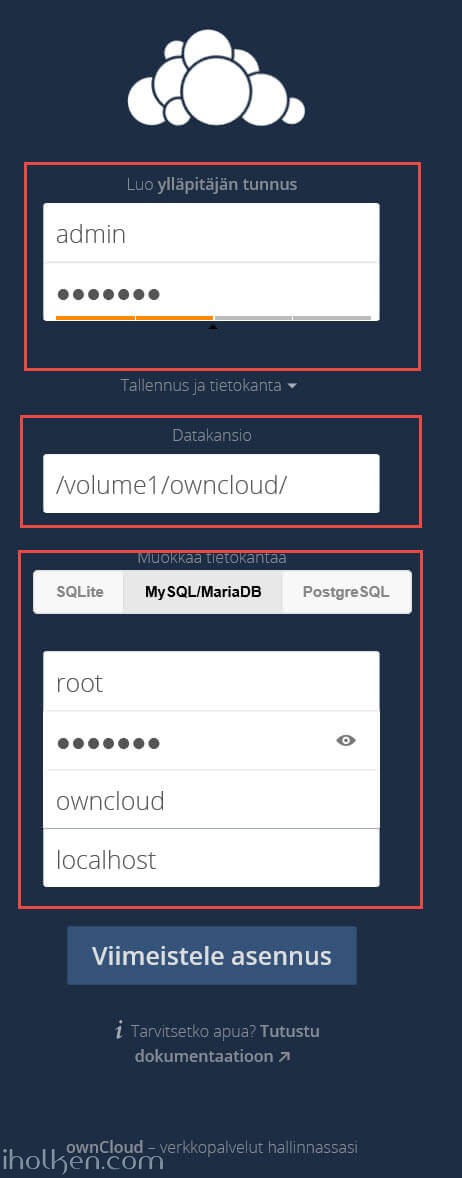
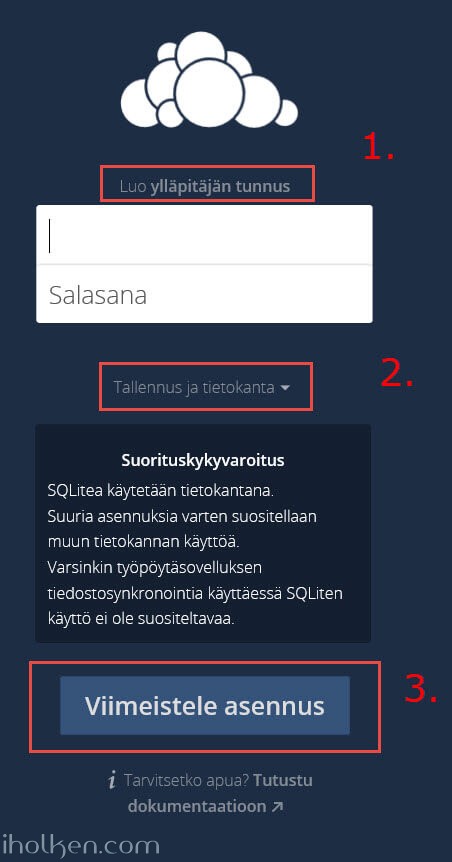 7) Give needed details for installing Owncloud. Highly recommended settings:
1. That you use MySQL/MariaDB – give database details needed
2. Define your Owncloud DATA folder to be outside the Web folder for Owncloud
 8) After installation the Owncloud web interface should open.
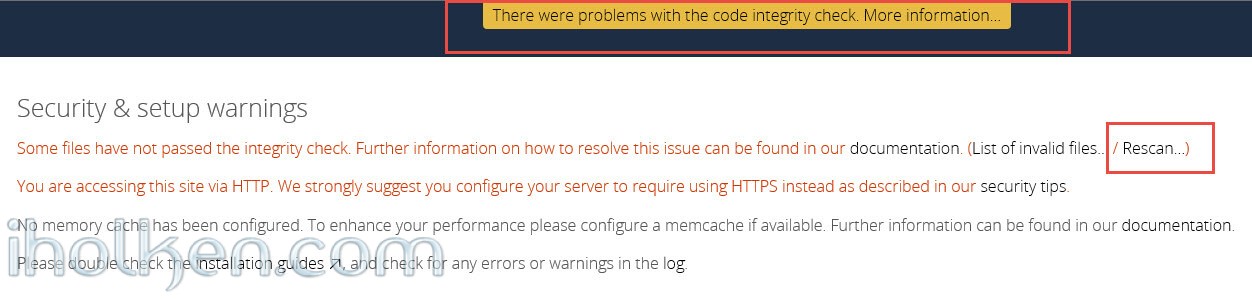
 If you see the error “There were problems with the code integrity check” – this is most likely because Synology creates @eadir cache folders everywhere. Removing these manually from Owncloud folders will remove the error. In this job you might find this code useful:
1 |
find . -name "@eaDir" -type d -print0 | xargs -0 rm -rf |
And here is example on how to use it:
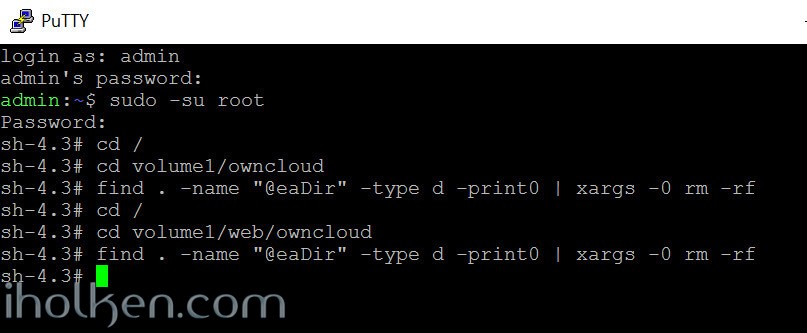
And you have now removed all ‘@eaDir’ folders from owncloud folders. And you should also be able to remove the error by Selecting ‘RESCAN’ on admin page of Owncloud.
 9) After installation you need to assign more strict folder permissions back for Owncloud folders. Please regard the given script as example only – always validate security permissions for your needs as required – and review related documentation from Owncloud.org for version 9.
I use a script (.sh) file, with following contents:
1 2 3 4 5 6 7 8 9 10 11 12 13 14 15 16 17 18 |
#!/bin/bash chown -R root:http /volume1/web/owncloud/ chown -R http:http /volume1/web/owncloud/apps/ chown -R http:http /volume1/web/owncloud/config/ chown -R http:http /volume1/web/owncloud/themes/ chown root:http /volume1/web/owncloud/.htaccess chown root:http /volume1/owncloud/.htaccess find /volume1/web/owncloud/ -type f -print0 | xargs -0 chmod 0640 find /volume1/owncloud/ -type f -print0 | xargs -0 chmod 0640 find /volume1/web/owncloud/ -type d -print0 | xargs -0 chmod 0750 find /volume1/owncloud/ -type d -print0 | xargs -0 chmod 0750 chmod 0644 /volume1/web/owncloud/.htaccess chmod 0644 /volume1/owncloud/.htaccess |
And I’m running it in SSH terminal like this (run it as root as it “can be done in DSM 6″ and from root folder in SSH terminal):
If you want to be able to edit the ‘max upload size’ section in Owncloud admin area, you might want to consider also having following permissions in place (upload size is overrided in hidden ‘.user.ini’ file in Owncloud root):
1 |
chown http:http /volume1/web/owncloud/.user.ini |
This makes the file writable by ‘http’ user, thus editable in Owncloud admin section.
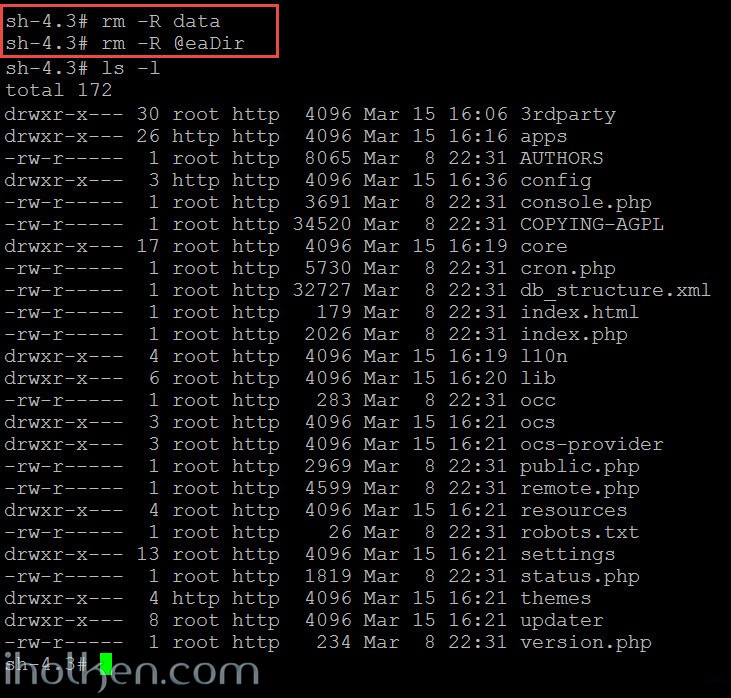
10) Double check that permissions got assigned correctly. You can also safely remove ‘data’ and ‘@eaDir’ folders inside ‘/web/owncloud/’ – they are not needed inside there if you created data folder outside the web folder as instructed:
 11) Done – You have successfully installed Owncloud 9 to your Synology NAS.
 Please follow closely Owncloud.org and Owncloud Github for further configuration, setup and any other topical issues. There are million things still to configure in your Owncloud setup including config.php modifications etc.
 Note: It is possible to install Redis server and php extension php-redis to your Synology NAS, in order to support Redis caching and file locking in owncloud. Please see my other blog post for installing phpredis into Synology NAS running DSM6 without bootstrapping. Also I have posted a guide on how to configure Owncloud to use system CRON in Synology NAS (DSM 6 RC).
(update 28.3 2016 – cleaned permission scripts and made addition about PHP open_basedir config required if data folder outside Owncloud web folder)
(update 13.6 2016 – Updated Apache as the preferred webserver for the virtual host configuration in Synology NAS. Mainly because Apache works out-of-the-box. Nginx actually requires more configuration – especially the re-write rules may cause headache and 404 not found -errors.)
(update 14.2 2017 – Updated Apache 2.2 as the preferred webserver version for the virtual host configuration in Synology NAS, due to multiple users reporting issues when using Apache 2.4 with latest Owncloud and DSM versions.)

Juha Ketola


hi there, did u manage to get the cron job that owncloud needs working on dsm 6?
Hi,
I have it actually running with Ajax – so have not even tried myself. Will try some day here and update you.
/Juha
Hi,
Tested and seems to work just nicely with Synology system CRON calling the Owncloud cron.php every 15 mins. Please check my latest post for details:
Post
Hi,
Thanks for the write up on getting OC’s cron to work with system’s cron service.
This is the alternate solution which I managed to get it to work as well.
1. Add the following entry into /etc/crontab
2. */15 * * * * root /bin/su -s /bin/sh -c “/usr/local/bin/php56 -f /volume1/web/owncloud/cron.php” http
Thanks JR for this.
Do you happen to know if/when the crontab contents are overwritten by Synology? Is it on DSM upgrades, or also if you make changes or create new ‘Scheduled Tasks’ in admin UI?
Above is the only thing that you need to consider, when doing this stuff directly to Synology ‘core’ files which can be edited/ managed also in the Synology admin UI.
/Juha
Tried installing owncloud on my DS1815+ running DSM 6.
Using your script gives me the error:
chmod: missing operand after ‘777’
When I change the owner and permissions myself to the install and data folder I keep getting the error:
“Can’t create or write into the data directory /volume1/Owncloud/”
Any idea how to solve this?
Please doublecheck that all those items exist that you try to chmod. You might be missing some htaccess file or similar. If that is the case, just exclude those rows. You can run those commands manually as well, as root from systemroot folder.
Are you sudo root, when changing permissions through script? Doublecheck how you created the external data folder and what are current permissions there, fix accordingly…
Ideally you need to be able to execute the script without errors, so that all permissions are going through correctly.
Just comment out or remove the non-existing items (if any) and you should be just fine and install will be successful.
/Juha
Strange! When using my LAN adress I was able to set up my owncloud server but when using my WAN adress to login after setup I’m still getting the no permissions to data folder issue.
Hmm, It could be that php cannot access it through wan. Try adding your owncloud data folder into php open_basedir in your dsm php settings in synology admin ui.
Remember to add wan address to allowed sites in owncloud config file – if you installed it from local lan….. Won’t work otherwise…
/Juha
Folder has owner http:http with 777 permissions.
domain was already added in config:
added folder to openbasedir at the end as ‘:/volume1/Owncloud’ and that did the trick!
Thanks for your help, awesome!
Excellent!!! And don’t forget to make the folder permissions more secure now after succesfull install as I have written in the guide.
I’ll update my guide to include the open_basedir modification in case the data folder is set outside web folder. It makes many things easier if the data folder is outside (for upgrades etc.) – but then u need to modify your open_basedir for php access…
Thanks
awesome guide. I should be able to get this to work.
however I am stuck at step (6)
when i point my web browser to owncloud.domain.com i get
The Xxxxxx page isn’t working
Xxxxxxx is currently unable to handle this request.
500
I can see that i forgot to deselect “Enable PHP Cache” in PHP Settings.
Google and owncloud forum is pointing me at “xcache” troubles – witch I have no experience in..
any advice?
/ Jesper
Hi Jesper,
Thanks for your comment!
Any chance you could try to initiate the Owncloud install from intranet side (ip.xxx.xxx.xxx/owncloud). That way you could eliminate issues with your web server or virtual hosts. If it works, then it is about web server or virtual hosts config and nothing to do with Owncloud itself…. But once you get things fixed, you need to add the wan side address to Owncloud config file for allowed sites – otherwise wan access will not work……
Hi Juha
Thank you for your reply.
I looked at my setup with a fresh pair of eyes and found that I had only copied 17 of 27 from download zip to /web/owncloud directory
now i see why i never got to the initial setup part. woops 🙂
I am following your guide now. and so far, all is joy.
/ Jesper
Thanks Jesper for confirming that you found the issue and were able to resolve it – I appreciate it a lot!!!
Please do let me know if there were something wrong or missing from the guide – and I will be more than happy to update and improve it further!
/Juha
Point 6. How do I open the portal? Can’t figure out the correct path.
Hi,
It is exactly like opening web site hosted in your NAS. And completely dependent on how you are trying to connect to the portal (LAN or WAN), and how you defined your virtual hosts. In practice it is just the same way, as any other web page you publish to your Synology NAS.
Case 1)
If you have defined the virtual host and path in your webstation setting following way:
Hostname: owncloud.mydomain.com
Documentroot: web/owncloud
You would connect from WAN, through Synology web station and virtual hosts config:
http://owncloud.mydomain.com
So exactly same way as any other web page published and server from your synology.
2)
If you want to install owncloud through LAN (Thus you need to add your WAN address into allowed sites in owncloud config.php after install):
Use your local path to your web and Owncloud folder for example like this:
192.168.500.10/owncloud/ (my.local.nas.ip/owncloud/)
You can also search basic Synology guides on just hosting a web site in your Synology NAS. This is kind-of pre-requisite in order to be able to install owncloud…..
/Juha
Then definitely something is wrong. It says server not found when I go with option 1 and with option 2 it says No input file specified. I followed all your steps, are there others I need to do previously to the ones pointed out in the article?
Hi Christoph,
Strange indeed, I’ve so far installed this to 3 different Synology NAS boxes – with the latter 2 I was following these steps exactly. So all needed for installing Owncloud is there. I have also received feedback from successful installations as well…
So – if you have checked, that:
1) You have ALL the needed files and folders copied successfully to your web Owncloud folder from downloaded ZIP package
2) You have successfully assigned permissions for the install: http as owner and chmod 777 for all needed files and folders
3) You have successfully installed and enabled all pre-requisites
4) You have successfully configured your Synology virtual hosts and Web station
And still not working….. I would go back and start from the scratch with following:
1) First test that the web station and virtual hosts is working as intended in your box –> empty whole Owncloud folder in your web root and just put there simple phpinfo() content and name it as index.php, that runs in PHP and provides information about your PHP installation. If you can access that from WAN and it is working as expected, your web config is OK and PHP is working, –> and only then move forward with the Owncloud installation steps from the beginning. Following the steps exactly all the way.
Ensuring those 4 steps I outlined in the beginning of this reply.
It will work – but you need to be careful with all the steps.
Please let me know how it goes. Thanks.
/Juha
Thanks, but unfortunately something seems to be wrong with my web config since I can’t access the phpinfo file. This makes me crazy.
Hi Christoph,
I kinda suspected that based on your symptoms, that is why i proposed to you to try it…
Ok, start from basics and look at your Synology webstation package. Is it running? If you are not hosting other websites, perhaps uninstall/re-install webstation? Is php module installed and working at least in command line? Start from getting simple http page deployed, then next php web page deployed and available to your NAS.
Are you allowing http or https traffic from your lan or wan to your NAS? Have you configured your firewall? Have you customized your vhosts files, or .htaccess files in your Synology? There are million things to check, just start somewhere and work forward from there….
Good luck!
/Juha
Hi Christoph,
Could you check the PHP open_basedir configuration. Just to make sure that you have appended the path there, and not removed the existing ones. I also updated the guide to highlight this.
In case you have deleted old entries, return synology defaults and add in the end the required owncloud data folder as in guide.
/Juha
Hi Juha
I got everything working following your guide. 🙂
But I am really struggling to redirect http://owcloud.domain.com to https://owncloud.domain.com
I have already imported my newly created owncloud.domain.com certificate, but I cannot figure out how to map it to owncloud and get the redirect logic working.
DSM6
Apache2.2
Owncloud 9
Hi Jesper,
Good to hear that you got owncloud running.
About the http to https I did it roughly following way:
1. I installed the certificate to Synology
2. I forced all the traffic coming to my Owncloud virtual host to https in the synology apache …..vhosts config file
[cannot add code example, formatting removes critical parts]
There is downside in my approach though – when ever you make changes to your vhosts in Synology admin UI, the box overwrites whole vhosts file, and you need to replicate the changes there again.
I can provide more detailed instructions some day later, if you feel you need those.. Let me know.
/Juha
Dear Juha,
when creating the virtual host, what type of webserver should I user? Apache or Nginx?
Zero
I have used apache. But I guess it comes down to the fact which is more familiar for you. Owncloud.org have many config examples for both web servers in Owncloud context.
/Juha
DSM 6
Apache2.2
I hoped adding
SSLEngine on
SSLCertificateFile /path/to/your_domain_name.crt
SSLCertificateKeyFile /path/to/your_private.key
SSLCertificateChainFile /path/to/DigiCertCA.crt
to /usr/local/etc/httpd/sites-enabled/httpd-vhost.conf-user would map my new certificate to owncloud site. but aparently not 🙁
Hi Jesper,
I tried to create a comprehensive guide for enabling HTTPS for Synology and Owncloud combo, including the HTTP to HTTPS re-direct. Please take a look and let me know what you think. Hopefully it will help you in some way to find your own working setup for securing the connectivity between clients and Owncloud.
See The Post Here
Thanks.
/Juha
Dear Juha,
I had the same error like Christoph: “No input file specified”.
I think it might be good to share what I have done to fix this.
At step 2 you state that we have to append the location of our Owncloud data folder to the open_basedir.
My failure has been that I replaced everything and did not append it.
It did not work when my open_basedir has this setting: :/volume1/owncloud
It is working when my open_basedir has this setting:
/tmp:/var/services/tmp:/var/services/web:
/var/services/homes:/volume1/owncloud
Maybe your screenshot is a little “misleading”. Or do I understand the screenshot wrong?
Hi Zero,
Thanks for the suggestion – I will update the screenshot to emphasize that it should be added to the end of the existing paths. Even though I state that it should be appended – I agree that the screenshot may be misleading.
Thanks.
/Juha
@Zero, now the opendir screenshot has been updated in the guide.
Do you think it is more clear now, that the text and screenshot highlight the fact that existing paths should be left intact?
/Juha
Perfect.
I think it’s absolutely clear now.
Thanks for updating.
Hi Juha!
Many thanks for the easy to use guide. It all worked well for me including the CRON setup.
Finally there is one question left: How can I get pwauth running? I used it in older ownCloud setups but it does not seem to work with DSM 6 and OC9. Have You got any idea?
Many thanks
/Peter
Hi Peter!
Thanks for the compliments! 🙂
What comes to the owncloud part – I assume you downloaded the “Unix user backend v2.3” Owncloud app and copied the extracted folder ‘user_pwauth’ to Owncloud/apps? This will import the app to Owncloud 9 and settings visible into admin UI. And there are feedback that the app itself is working with Owncloud 9.
So I guess this comes down to Synology / Apache installation/config then. May I ask how have you enabled pwauth in Synology, please provide exact installation details if possible?
What is the exact problem you are facing, can you see the NAS users in Owncloud users listing? Or you can see the users but login is failing? Or something else?
/Juha
Hi Juha!
You are right. I can see the app in the administrator section of OC9 because I copied it to the apps folder and activated the app. But I can not see any user that I created on the NAS in my OC-User Section.
I do not know which action need to be done at Synology / Apache to make this work with ownCloud 9. Unfortunately my knowledge is good enough to follow a detailed guide but beyond that I am kind of helpless …
So any kind of help would be highly appreciated.
/Peter
Hi Peter,
I created new post with short guide on how to enable pwauth and NAS user accounts with your Owncloud installation in your Synology. Please take a look and let me know.
I’m also in the process of creating a guide for the apache integration – will let you know once available.
/Juha
Hi Juha,
thanks for the great instructions. I have one problem , the file handler can not be changed. i have change the permission back to 777 (htaccess/user.ini) but the field is gray. I have edit the “.htaccess” and “.user.ini” and started the NAS again, but nothing works, do you have any ideas?
Many Thanks
/Björn
Hi Björn!
Thanks for the compliment.
Could you kindly open up a bit more the issue you are facing, what actually is grayed out now, and what is not changing? I could not follow your symptoms…
Something in DSM admin UI? Or something in SSH terminal? And what is the impact – what is not working now in your setup?
/Juha
Hi Juha,
the field “file handler” under administration (owncloud backend) where you can set the upload size (default 513MB). This field ist gray and can not be edit. I have set the permissions from the .htaccess and .user.ini back to 777 and restart the NAS but the field is still gray. After this, i have edit the .htaccess and .user.ini and set the value…
upload_max_filesize=513M
post_max_size=513M
to
upload_max_filesize=2G
post_max_size=2G
but this won´t work, i have no more ideas.
/Björn
Ok – got it. For me it works – here is how.
1. Login with ssh & sudo -su root
I use following settings there:
—–
upload_max_filesize=1995M
post_max_size=2000M
—–
And it works for me right away. In Owncloud It is grayed out for me in admin settings as well. Mainly because I want to keep it that way.
If you run following command:
What is the reaponse?
For me it is:
-rw-r—– root:http .user.ini
Which is absolutely fine, writable by root, readable by http. So that it works as expected for Owncloud.
And if I give the following command:
It becomes editable in Owncloud as well – as now the owner is http.
Please let me know if any of above will help you in your troubleshooting.
If not – we will continue from there. We will get this solved for sure.
/Juha
Hi Juha,
the respons of
was
after
i could set the value to 2GB.
Thank you so much, it´s works now 🙂
Best regards
/Björn
Great to hear – thanks for confirming!
Appreciated!
/Juha
Hi Juha,
thanks for putting this together, it was really helpful. Everything seems to work, but I am having a few problems, that I was not having when I was using the SynoCommunity package.
1. I am having some serious memory swapping issues, is there a particular setting that I can change so that it doesn’t happen?
2. A lot of files cannot be sync’ed or deleted because of lock problems. Do you have an idea of what it could be?
I was going to ask the questions on the owncloud forum, but I thought I would give it a try here first.
I have a DS214Play, and like I said, worked well with Owncloud 8.1.1-7 package.
thanks for your help,
-N