
In this post I will go through the steps required to enable pwauth and user login with Synology NAS user accounts into Owncloud 9 installed into Synology NAS device running DSM 6 (release candidate). This makes managing user accounts easier, as by creating new user to NAS, the same account can be automatically used to login into Owncloud without adding the user separately to Owncloud.
Pwauth is the core component for this, and I will try to clarify the minimum basics for enabling this funtionality, but this guide is not by any means meant to be comprehensive guide to PAM and all the configuration settings possible in that domain.
PAM is a centralized authentication mechanism (Pluggable Authentication Modules), in practice a flexible mechanism for authenticating users. It provides a way to develop programs independent of system authentication scheme. This way you don’t have to implement the system specific authentication tools to every application, but actually through PAM you can verify the user credentials by utilizing so called ‘authentication modules‘ during runtime.
Our installation procedure will have roughly following steps:
- Install and enable application ‘Unix User Backend’ into your Owncloud instance
- Utilize Debian chroot terminal (yes – we need to introduce new packages to Synology):
- Install pwauth
- Does the authentication
- Install pwauth
- Configure PAM authentication module
For synology devices in general the challenges in all this comes from the fact that installation of new packages is a bit more complicated than to ordinary Linux installations. However – on the upside in all this is, if you CAN do this for Synology device and you somewhat UNDERSTAND the steps done in this guide – you can do this a lot easier for normal Linux installation, or further enable this for any normal website running and hosted in your Linux machine.
I have tested the setup with 2 different Synology NAS devices:
- 1) DS214 (32-bit)
- 2) RS815+ (64bit)
- And this process is confirmed to work for both NAS devices. However there are different steps required, depending if target NAS device is 32bit or 64bit. This guide has the required steps for both included now – so follow instructions carefully.
(Important NOTE: Due to the limitations of the pwauth module – you cannot import the email address from Synology NAS to Owncloud when importing the user. By default this limits the functionalities of Owncloud in many ways. And when using pwauth, you cannot add the email manually to Owncloud either. So this is a clear downside in this approach of simplifying the user management between Owncloud / Synology NAS which you need to know and consider.)
Disclaimer – you utilize the instructions on my site with your own responsibility. And I sure do not guarantee that these instructions work exactly as they are for all Synology devices. I am providing these documented steps for those who enjoy problem solving and fiddling with IT systems, and perhaps are wondering what all things can we enable for different devices. These instructions might also help you to further troubleshoot particular issues or challenges in your own setup.
Ok – let’s get to the guide.
(Remember that in DSM 6 you can sudo to root, so please execute terminal activies always as root)
1)
Download and Install Owncloud application ‘Unix user backend’ from Owncloud apps. At the time of writing this post – it is on version 2.3 and can be found from here:
Unix user backend v2.3 (apps.owncloud.com)
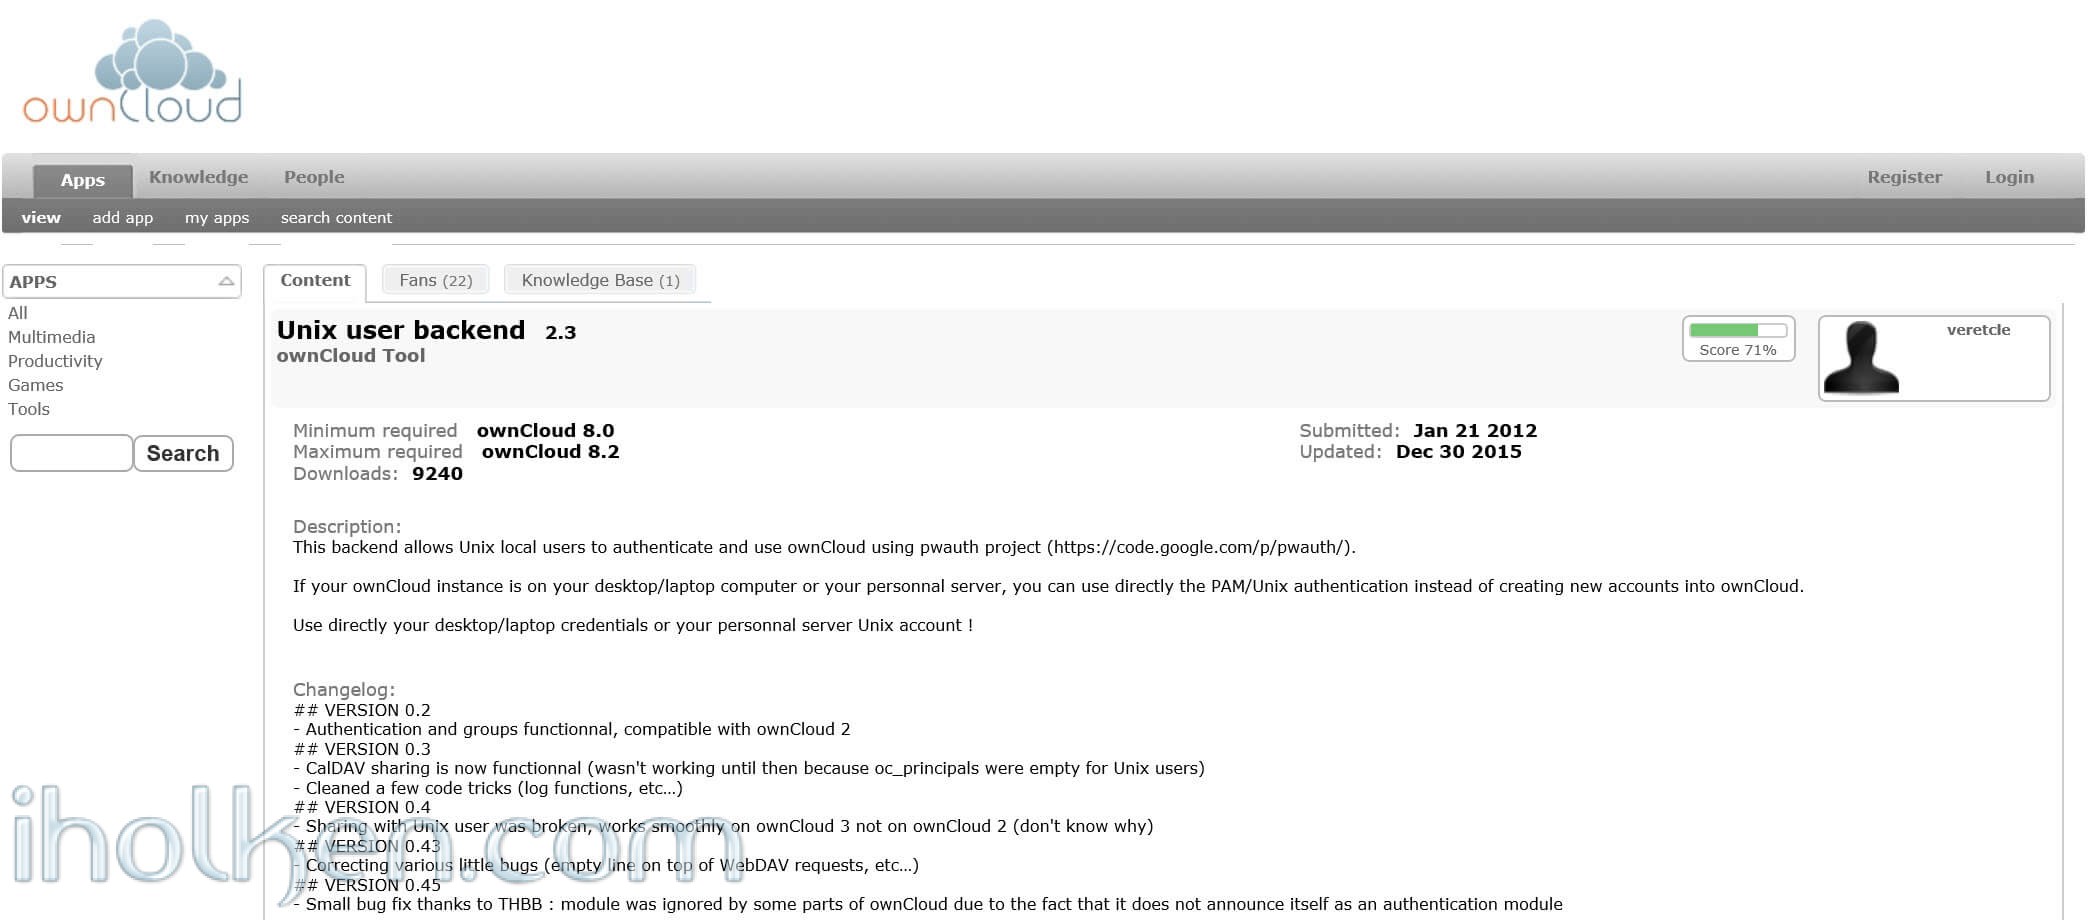
Download and extract content of the ZIP archive (folder: user_pwauth) to your Owncloud /apps -folder:
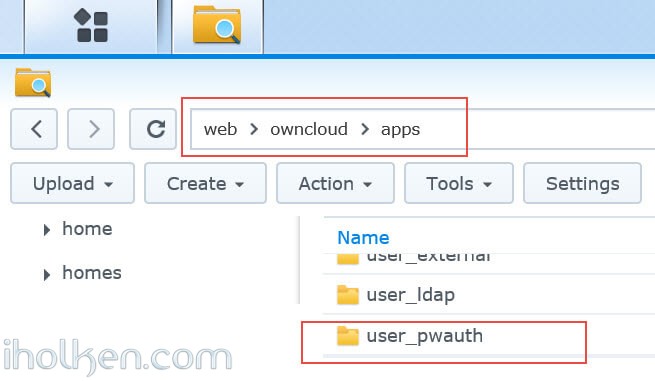
Ensure that folder owner and permissions match to the other folders located in /apps:

This might be useful for this (based on my Owncloud installation guide-post):
1 2 3 |
chown -R http:http /volume1/web/owncloud/apps/ find /volume1/web/owncloud/apps -type f -print0 | xargs -0 chmod 0640 find /volume1/web/owncloud/apps -type d -print0 | xargs -0 chmod 0750 |
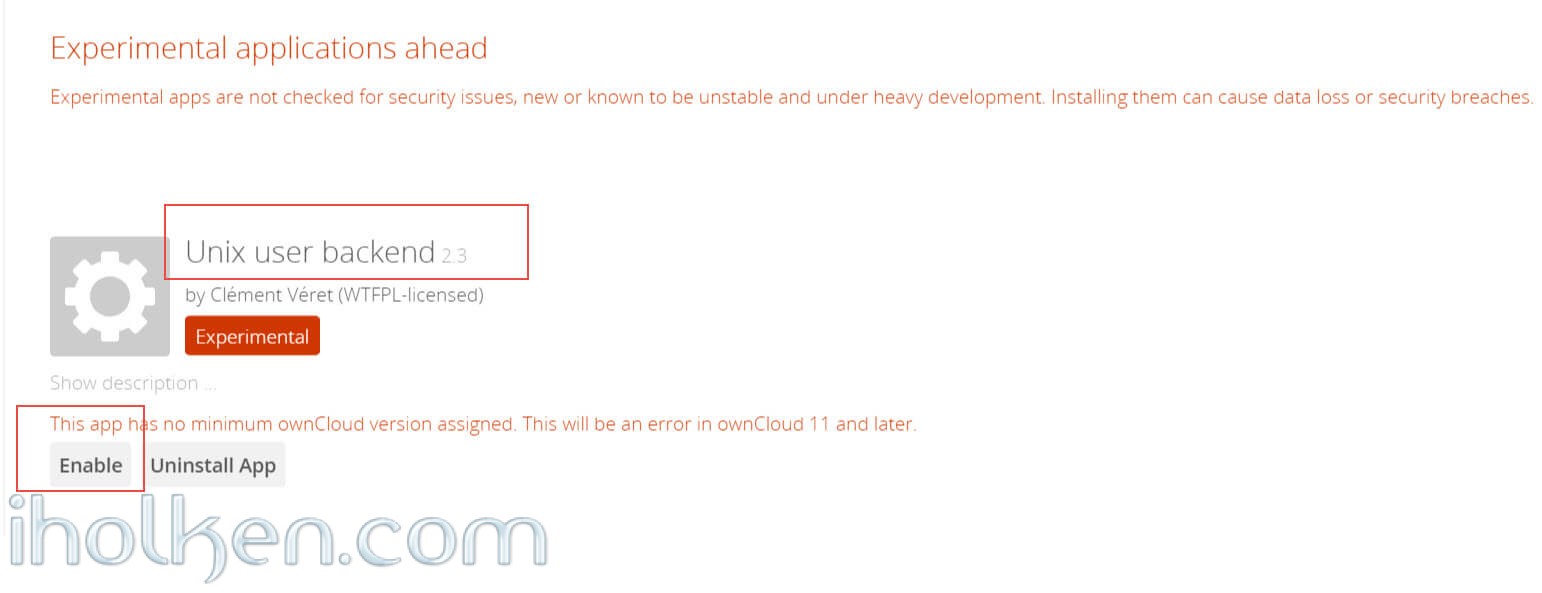
And then login back to Owncloud admin section and enable the application in Owncloud apps section:
2)
In order to enable pwauth – we need to install new package into our Synology. This package is not available from Synology package center, and I don’t want to start bootstrapping with ipkg –> I chose the approach to utilize ‘Debian chroot’ package from Synocommunity.
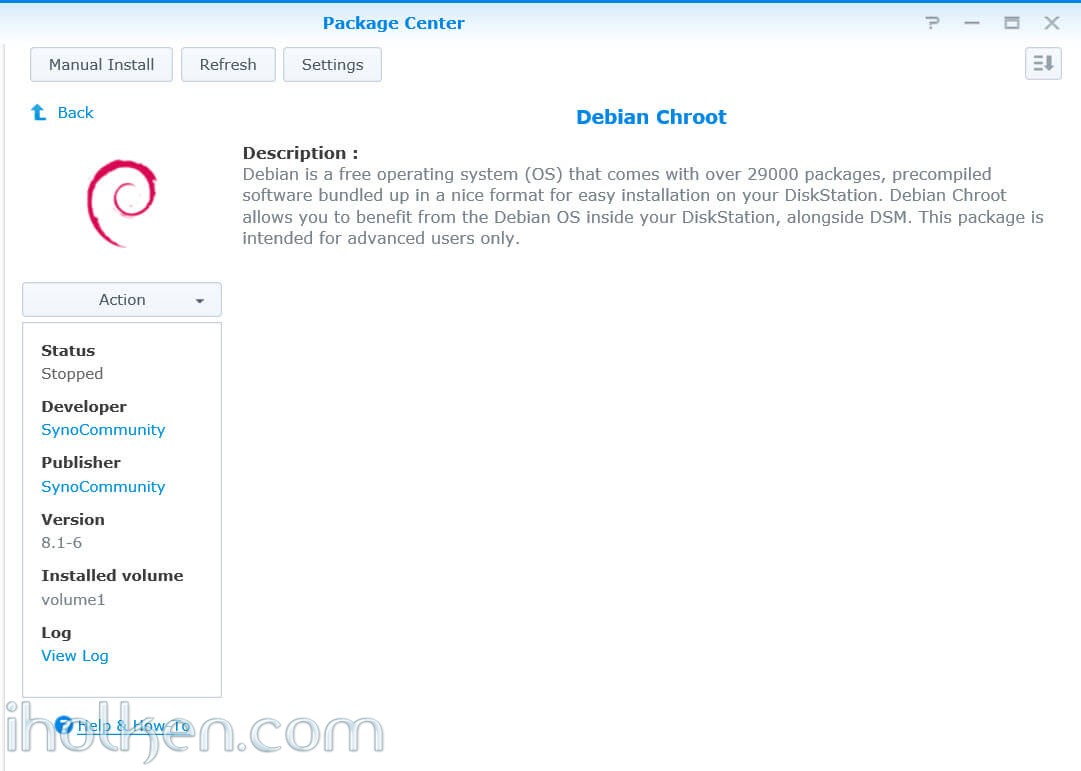
Debian is a free operating system (OS) that comes with over 29000 packages, precompiled software bundled up in a nice format for easy installation on your DiskStation. Debian Chroot allows you to benefit from the Debian OS inside your DiskStation, alongside DSM. And as this is used only for one-time install purposes, you can actually remove the Debian chroot from Synology package center afterwards – if wanted.
1) As a first step (only if you do not have it installed yet) – install Debian chroot package from Synocommunity in Synology Package Center (no need to start the package in package center).
(Debian chroot package and environment for Synology is 32bit, so there are different steps required for 32bit and 64bit target systems.)
Below guide has separate steps for 32bit and 64bit Synology NAS versions. For the 64bit version we actually build a 64bit Debian chroot instance to Synology. Please choose your section based on target NAS you would be deploying this.
64bit -target
For 64bit environments, it would be a lot more convenient to use 64bit Debian chroot – no doubt about that.
Unfortunately that is not by date yet available from Synocommunity as downloadable package. It is possible to make though – and for this purpose there are some sites out there in the web that can help you in doing that very thing in details.
For example:
But for this purpose I am using a x64 Debian Wheezy distro grabbed from this github location:
- lioujheyu’s Github work: https://github.com/lioujheyu/syno-chroot-gitlab
- You will find the link to the distro on the page using the ‘here’ link (debian7_20150207.tar.gz)
Huge thanks to above contributors for their work on this chroot area!
Here is an example flow on how to download the above file from the site:
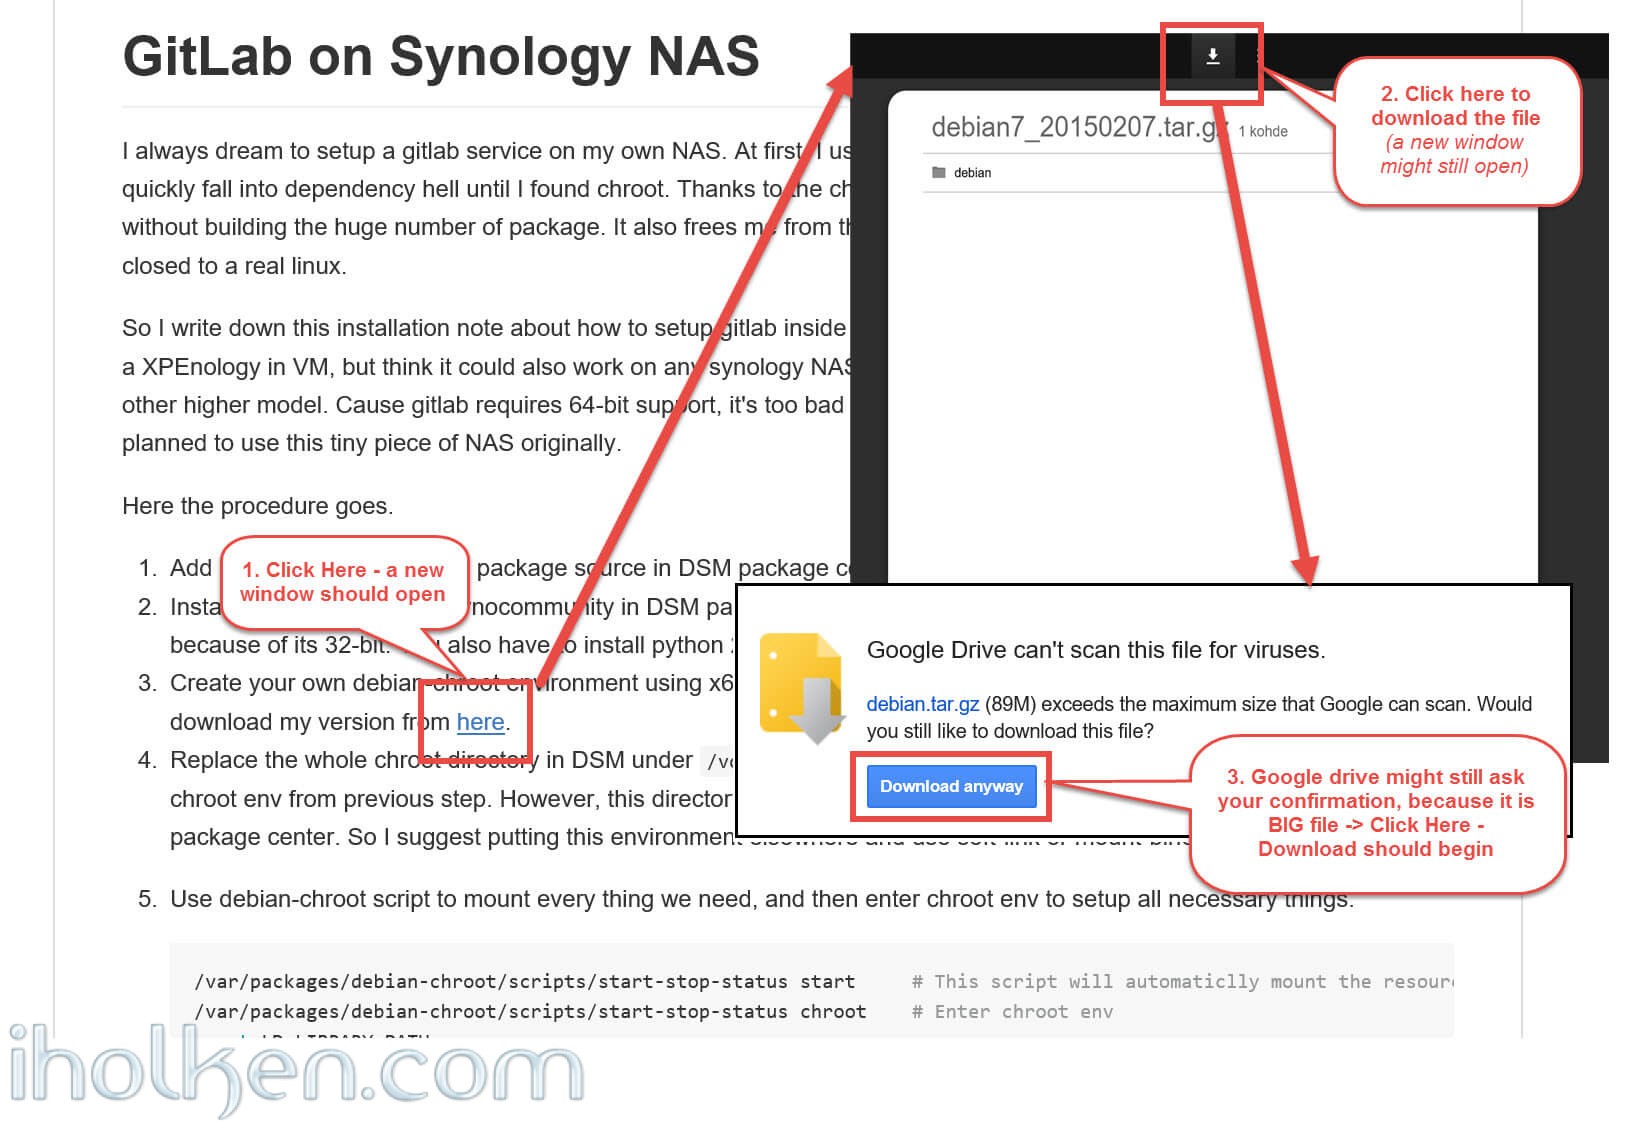
Now you should have downloaded the file (debian7_20150207.tar.gz).

Next task is to upload the file to your Synology NAS, into some shared folder or similar. So that we can further use the file.
After you have made your own version of x64 distro, or downloaded a distro – all we need to do is replace all the contents from the whole chroot directory in DSM under ‘/volume1/@appstore/debian-chroot/var/chroottarget’ with our own chroot environment made above.
As we had installed earlier the Synocommunity version of Debian chroot, we will still use its scripts installed, but not the debian environment because it is 32-bit and we now wanted to operate in 64-bit environment. If you at some point decide to uninstall the Debian chroot environment from Synology Package center – the whole directory will be gone just like with the 32bit version.
(make sure at this point that the chroot 32bit package is NOT running in Synology package center):

Here are some example steps after I uploaded the ‘debian7_20150207.tar.gz‘ package to Synology NAS and then login into SSH terminal (detailed steps so it is clear what is happening):
First I will find the location of the uploaded file:
1 2 3 |
sudo -su root cd / find / -name 'debian7_20150207.tar.gz' 2>/dev/null |
And the same in terminal output:
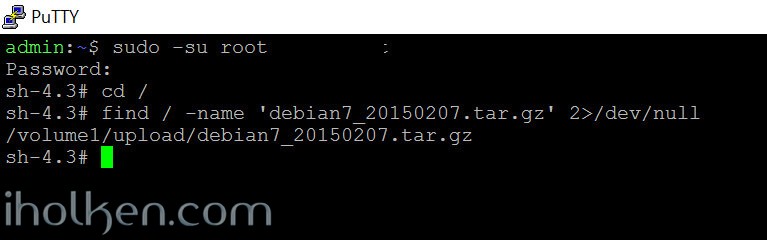
I uploaded the distro into shared folder in my NAS named ‘upload‘, and now I know the exact path to the file. Now I can proceed with the next set of commands (please modify your upload path accordingly to the ‘mv …’ command):
1 2 3 |
sudo -su root mkdir /tmp/chroot_tmp mv /volume1/upload/debian7_20150207.tar.gz /tmp/chroot_tmp/debian7_20150207.tar.gz |
Now you should have copied the file successfully into ‘tmp/chroot_tmp’ – lets check:
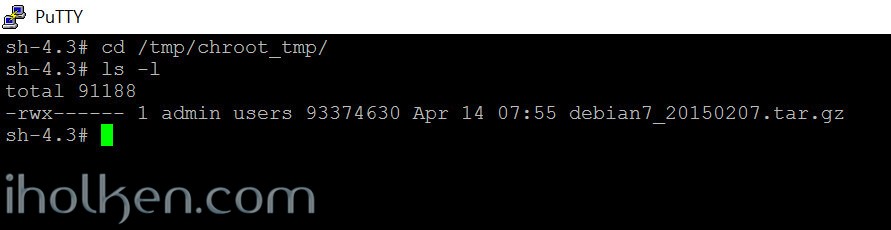
If everything looks correct – we can move to next steps:
1 2 3 4 5 6 |
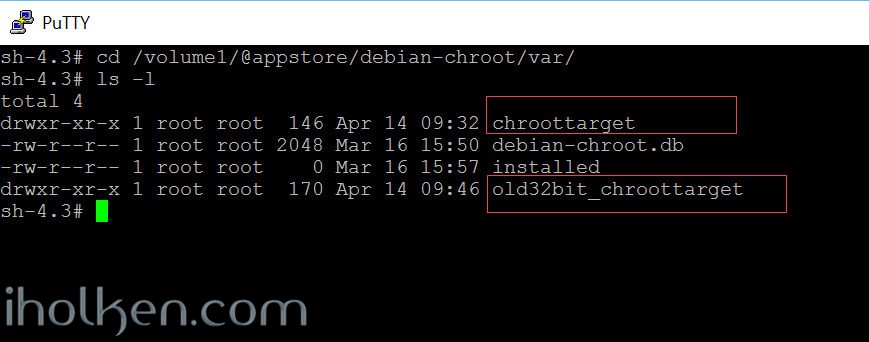
sudo -su root cd /tmp/chroot_tmp tar -zxvf debian7_20150207.tar.gz mv /volume1/@appstore/debian-chroot/var/chroottarget /volume1/@appstore/debian-chroot/var/old32bit_chroottarget mv /tmp/chroot_tmp/debian /tmp/chroot_tmp/chroottarget mv /tmp/chroot_tmp/chroottarget /volume1/@appstore/debian-chroot/var |
After those steps, your old 32bit debian chroot is still existing in the ‘volume1/@appstore/debian-chroot/var/old32bit_chroottarget’ directory:
You could when ever revert the steps made for this by running:
1 2 3 4 |
*** just an example - do not do this as part of this guide ** rm -R /volume1/@appstore/debian-chroot/var/chroottarget mv /volume1/@appstore/debian-chroot/var/old32bit_chroottarget /volume1/@appstore/debian-chroot/var/chroottarget |
Now you should be able to access your 64bit Debian chroot environment the same way as you earlier did with 32bit:
1 |
sudo /var/packages/debian-chroot/scripts/start-stop-status chroot |
Then run exactly following commands in this order:
1 2 3 4 |
unset LD_LIBRARY_PATH /debootstrap/debootstrap --second-stage # This will install all needed core packages into your chroot passwd root # Set your root password for this Debian chroot instance nano /etc/apt/sources.list # Fill your desired debian package repositories |
Example ‘sources.list’ content for Debian Wheezy:
1 2 3 4 5 6 7 8 9 10 11 12 13 14 |
# Whatever's uncommented first in this file counts as the "main" distribution # (unless you change the ordering). See /etc/apt/preferences for more # information on how apt-pinning is set up. ################################################ # Debian 7.0 (Wheezy) # CURRENT STABLE deb http://ftp.de.debian.org/debian/ wheezy main contrib non-free deb-src http://ftp.de.debian.org/debian/ wheezy main contrib non-free deb http://security.debian.org/ wheezy/updates main contrib non-free deb-src http://security.debian.org/ wheezy/updates main contrib non-free deb http://ftp.de.debian.org/debian/ wheezy-updates main contrib non-free deb-src http://ftp.de.debian.org/debian/ wheezy-updates main contrib non-free deb http://ftp.de.debian.org/debian wheezy-backports main contrib non-free deb-src http://ftp.de.debian.org/debian wheezy-backports main contrib non-free |
(NOTE: there is a very specific reason I used Debian Wheezy (7) distro and not Debian Jessie (8). The pwauth apache module required for further integration of pwauth to regular websites does not have the correct version for Apache 2.2 used currently in Synology NAS devices. Jessie has packages only for Apache 2.4.)
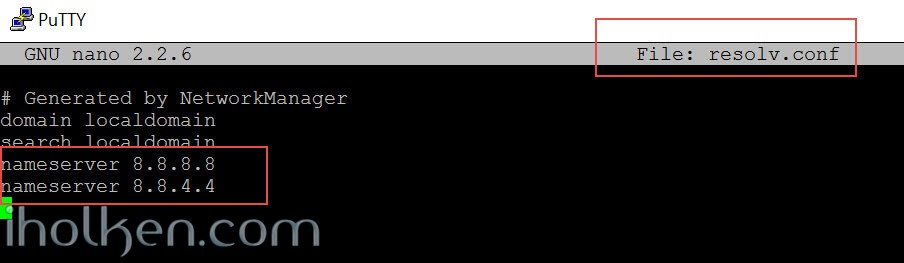
Next you need to modify the ‘etc/resolv.conf’ file with correct nameserver details for your setup.
1 |
nano /etc/resolv.conf |
You can have there either:
- ISP provided nameservers
- Local nameserver(s) that you have in your network
- Public nameservers like google 8.8.8.8 or 8.8.4.4
Example in terminal for the file:
You have successfully enabled 64-bit Debian chroot instance to your NAS. And easily by renaming the folders, you can move between the 32bit and 64bit installation, as they share the start-up-scripts.
Now we can continue with our installation of pwauth.
Continue from here with general steps valid for both – 32bit and 64bit target systems.
By keeping in mind this:
- With 32bit you use the 32bit Debian chroot
- With 64bit you use the newly created 64bit Debian chroot instance we did above
We continue the installation in Debian chroot terminal, please login and sudo – if not there already. And in chroot execute following commands in terminal.
Terminal example:
1 2 3 4 5 6 7 8 |
sudo -su root sudo /var/packages/debian-chroot/scripts/start-stop-status chroot apt-get update apt-get install zip unzip apt-get install --reinstall make apt-get install gcc apt-get install libpam0g-dev |
The first command will start Debian chroot and bring you to the Debian environment terminal – and the next commands will update and install all the needed debian packages for compiling (making) pwauth. You may have some of these components already, that does not matter – I’ve listed them all here because they are absolutely needed in the process.
Here the thing with pwauth is, that it will be compiled with pre-set configuration. You can configure a lot of things during compile, and if you try to install package with incorrect settings during compile – you will never get it to work correctly.
So the next task is to find a correctly configured pwauth for our Synology PAM setup. You are free to:
- Find one from internet
- Configure yourself from original pwauth code
- Or you can see if the one I have already ‘synology PAM’ modified and tested, and made available in github (forked from original) – is perhaps working for your Synology as well (most probably yes).
- https://github.com/ketolajuha/pwauth
- modifications:
- user_uids: root (0) and http (1023)
- changes in ‘Makefile’ and ‘config-h’ (see github compare for more details)
Next example piece of code is utilizing my ‘github pwauth configuration for Synology devices and PAM‘ code available in github:
1 2 3 4 |
wget --no-check-certificate https://github.com/ketolajuha/pwauth/archive/master.zip -O /tmp/pwauth_JKe_master.zip unzip -o /tmp/pwauth_JKe_master.zip cd /tmp/pwauth-master/pwauth make |
If everything went successful in your Debian chroot terminal, as it should have – you have now created your Synology compliant pwauth module. Exit Debian chroot now (we don’t need it anymore, we needed it only to compile the right pwauth file for us).
All the rest of the steps are done in Synology terminal side!
Next find/check the path to needed module to be copied to Synology structure.
Code example:
1 2 |
exit find / -name 'pwauth' 2>/dev/null |
Copy the needed file to Synology side from Debian chroot file structure:
- Compiled pwauth file into directory ‘/usr/sbin’
- Assign correct permissions for execution
Example code for doing this in my setup:
1 2 3 |
cp /volume1/@appstore/debian-chroot/var/chroottarget/tmp/pwauth-master/pwauth/pwauth /usr/sbin/pwauth chmod 755 /usr/sbin/pwauth chmod u+s /usr/sbin/pwauth |
(NOTE: it would perhaps be a good idea to store the made pwauth file into a backup location outside chroot / DSM system folders. In case you need it later due to hw crash or similar.)
Now you have enabled the pwauth, next we need to configure the PAM module in our Synology.
3)
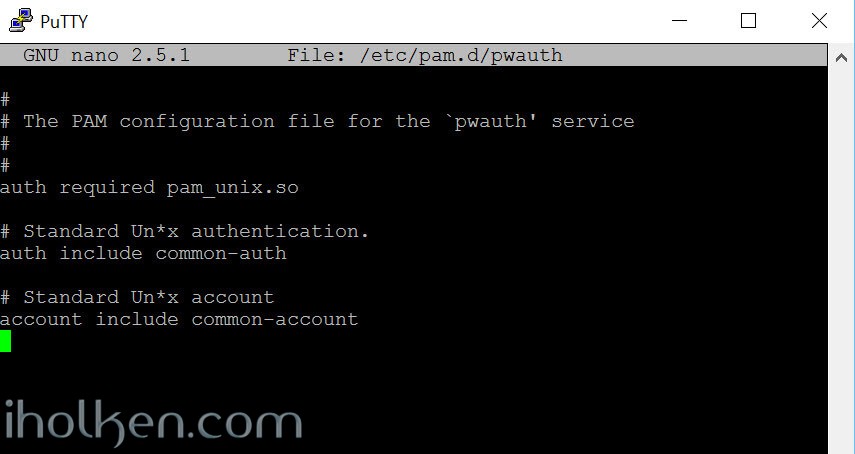
Next create the needed pwauth configuration file in Synology side structure in ‘/etc/pam.d’ :
1 |
nano /etc/pam.d/pwauth |
Please ensure that following is exactly the content in that file:
1 2 3 4 5 6 7 8 9 10 |
# # The PAM configuration file for the `pwauth' service # auth required pam_unix.so # Standard Un*x authentication. auth include common-auth # Standard Un*x account account include common-account |
And this is how it should look in your terminal:
Next you need to create the PAM mandatory configuration files, do this as sudo root:
1 2 3 4 |
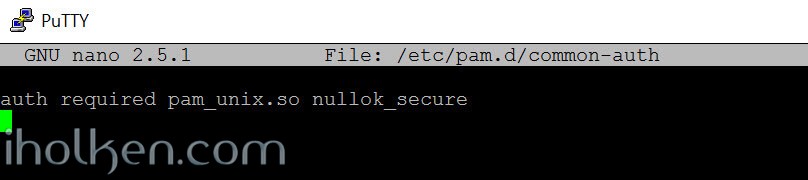
sudo bash -c "echo auth required pam_unix.so nullok_secure > /etc/pam.d/common-auth" sudo bash -c "echo account required pam_unix.so > /etc/pam.d/common-account" sudo bash -c "echo password required pam_unix.so obscure md5 > /etc/pam.d/common-password" sudo bash -c "echo session required pam_unix.so > /etc/pam.d/common-session" |
Check that the files got created correctly in ‘/etc./pam.d’ , and that the content is matching to above.
- common-auth
- common-account
- common-password
- common-session
Example content for ‘common-auth’ file in terminal:
(NOTE: it actually might be a good idea to take and store backups of these pwauth and PAM core files tom somewhere outside system folders itself. Synology has tendency to overwrite and delete files and folders on upgrades. So if that happens, you can easily copy the files again back to correct folders.)
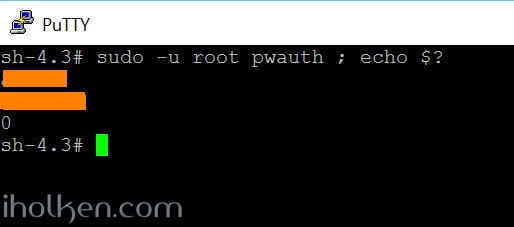
After this is done – you can actually test your PAM configuration in terminal. You should test the functionality with different NAS user accounts planned to use in Owncloud and correct and incorrect passwords, in order to confirm that results are consistent in all cases.
This can be achieved in terminal with following:
1 2 3 4 5 6 7 8 9 10 |
# sudo -u http pwauth ; echo $? <username> <correct_pw> 0 # sudo -u root pwauth ; echo $? <username> <incorrect_pw> 1 # |
(IMPORTANT NOTE: I have given in the example above 2 accounts that are (sudo)calling pwauth (HTTP and ROOT), these 2 accounts should be tested both that they are working!)
After you give the command, terminal will wait for your input. First <username> [enter], then <password> [enter]. Please note that these will be seen with clear text on screen(!).
Pwauth will return:
- 0 – for correct username & password combination
- 1 – or anything else for incorrect credentials
And here is still an example of terminal usage:
IMPORTANT NOTE!
If the NAS usernames have capital letters, the Owncloud authentication will not work. This might be an issue with the Owncloud application installed for this, as the capital letters will work just fine in SSH terminal when testing. But they will not work when trying to login into Owncloud. So please take this into consideration when deploying this.
If the testing is successful – please login into your Owncloud installation with your Owncloud admin account – as we still need to configure the application user uid ranges in admin screen to fetch the needed user accounts from our Linux system.
Here is an example of settings that should work for most cases.
- Check that the path is correct for pwauth (should be)
- 0-10000 uid range will cover most probably all user accounts in your NAS. It is a good starting point in that sense.
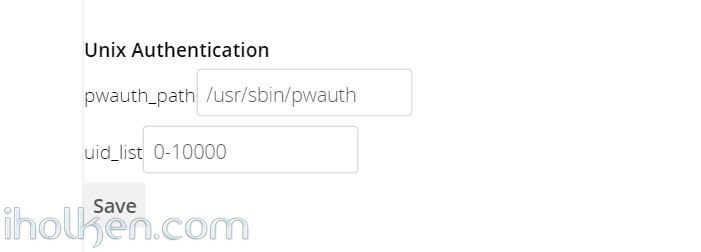
Hit ‘Save’ and you should start seeing all the possible NAS user accounts on the Owncloud users listing.
You can exclude some NAS user accounts – just by narrowing the uid range in above settings. If you don’t know the uid’s in your Linux system, you can just ask those in terminal like this:
1 2 3 |
id <username> uid=1024(testadmin) gid=100(users) groups=100(users),101(administrators),25(smmsp),10(wheel) |
And look the uid value from the response received.
Terminal example of use:

Now you should be all set, and all your users should be able to login to your Owncloud installation using their NAS useraccounts. Please let me know if this worked for you by letting me a response below.
(Update 14.04.2016 Major updates made to guide in order to include processes for 32bit and 64bit environments. Also included ready configured pwauth code for Synology / PAM environment. The process for 64bit systems actually includes a BONUS, as I do it by generating a second 64bit instance of Synology Community Debian chroot into our NAS device.)

Juha Ketola


Dear Juha!
Many thanks for taking so much time to put down this guide.
I do not have deep knowledge of unix and so I can only put the commands into my terminal as suggested. In some places it needs a little bit experimenting due to my unexperienced level of knowledge but in general I could follow all steps so far.
There is a problem in the last step when I enter the command for testing:
sh-4.3# sudo -u root pwauth ; echo $?
pwauth: error while loading shared libraries: libpam.so.0: cannot open shared object file: No such file or directory
127
And there is a problem logging in:
I can see all DSM users in the User section of the ownCloud admin.
When I try to log into ownCloud with the DSM users I am prompted “Wrong Password. Reset it?”
When I create a new user in ownCloud and try to log on it works fine.
None of the users is in capital letters.
Do You have any advice how to solve the problem?
Hi,
Ok – you are missing a library needed. That is why pwauth is not working. You need to get the test working in the end of guide, otherwise it will not work.
Please try to find the file in SSH terminal – let me know the output:
Are you on 32-bit or 64-bit system? Unfortunately Debian chroot is living in 32-bit world….
And I actually need to create 32bit and 64bit paths separately in to the guide.
Br,
Juha
Hi Juha!
This is the result:
/usr/lib/libpam.so.0
/volume1/@appstore/debian-chroot/var/chroottarget/lib/i386-linux-gnu/libpam.so.0
I am Running a DS415+ with INTEL Atom C2538 and with DSM 6.0-7321.
How can I find out if it is 32 or 64-bit?
/Peter
try command:
uname -a
, and if you find x86_64, you are on 64bit environment.
/Juha
… I am on 64!
Many thanks!
Hi Peter,
Now I have updated the guide to include the pwauth installation process for 64-bit systems, while still utilizing the Debian chroot environment.
I actually went a bit further than what actually was perhaps needed, as I enable 64 bit Debian chroot environment instance for Synology. Mainly because I wanted to find out how easily it can be done. 🙂
Good luck – let me know in case you try this!
Br,
Juha
Hi Juha!
I tried , but I got lost somehow.
When I run the command
sudo /var/packages/debian-chroot/scripts/start-stop-status chroot
I get the following error:
chroot: failed to run command ‘/bin/bash’: Input/output error
If I look at the details of chroottarget it show that it is the currently copied directory.
/Peter
Hi Peter,
I can’t help thinking that you are now between architectures. I have seen that error myself earlier, if one tries to call 64bit chroot from 32bit environment… That makes me wonder, if you have 64bit processor, but still 32bit os running on top….. Or something similar..
I have installed this now 2 x 32bit and 2×64 bit systems (clean systems), and the guide has worked flawlessly. hmmmm….
Perhaps you should revert back to 32bit chroot (see above guide for how-to) and try the 32bit process once more. If that is not working – it is worthwhile to investigate your arhitecture / OS, is it really 32bit or 64bit?
/Juha
Hi Juha!
I went through all of Your guide once again and it all went smoothly this time. But still it is not working. But I feel I am very close.
I copied pwauth to /usr/sbin/pwauth –
when I enter sudo -u root pwauth ; echo $?
the return is: sudo: pwauth: command not found
I guess the properties of the path are wrong: drwsr-xr-x 3 admin users 4096 Apr 15 08:47 pwauth
the properties of the pwauth file is: -rwxr-xr-x 1 root root 18937 Apr 15 08:47 pwauth
all other files in the pwauth folder are: -rwxrwx— 1 admin users 2058 Apr 14 03:20 Makefile
Thanks in advance
Peter
Hi,
There should not be at all an pwauth directory in ‘/usr/sbin/’ in Synology side, but it should be the actual ‘pwauth’ file only, that you generated in the Debian chroot. That file is answering the command ‘pwauth’ made in terminal, as it is in ‘/usr/sbin’ directory.
Did you make the copy command of pwauth file – exactly as in my guide was? And you need to do this copy command from Synology environment, NOT chroot:
This will copy the file ‘pwauth’ only, and after succesful copy and permissions commands, the file permissions should be in synology ‘/usr/sbin/’:
Hope this will solve the issue. It indeed seems you are close, if you were able to ‘make’ the actual ‘pwauth’ file in chroot already. Do yo happen to know why you had problems earlier?
/Juha
Dear Juha!
First of all: it works! Many thanks for Your patience with me.
If I analyse I would say that I do not have a very deep knowledge. If something does not work the way it is described in the guide I try to find a workaround. E.g. downloading the debian7_20150207.tar.gz ended in receiving a file like debian7_20150207.tar which resulted in extracting commands not working. So I had to use DSM an work in shared folder instead – > So probably this got me lost somewhere down the road
the command line cp /volume1/@appstore/debian-chroot/var/chroottarget/tmp/pwauth-master/pwauth/pwauth ended in ‘no such directory’ so I had to go to the directory and copy the file from there. And I do not really understand why Your command did not work since I used copy and paste …
At the end it was quite complex, but with Your support I got there!
Many thanks again and have a great day
Peter
Great to hear – thanks for confirming!!!!!!!
(Only rational explanation for the copy command not working, is that you were accidentally in Debian chroot side, then it would behave exactly like that. So that is why I made it more clear in the guide, when to exit chroot – thanks for that!)
Was it the x64 version in the end that was the right one for you?
And I would say, that if you categorize yourself as an un-experienced, and you still decided to go for it – and made it work –> impressive!
Take care!
/Juha
Yes x64 was the right one
Take care
Peter
Dear Juha!
Sorry to bother You again, but You seem to have the right knowledge to help me with another issue I am facing:
Connecting external storage does not work as I would expect in my setup.
Let me explain:
I wold like to create a set of folders inside a shared folder called oc-external. the folders ,lets call them a, b, c, d, are some kind of user folders that I would like to assign to different users by connecting external storage.
what chmod and chown command do I have to operate to make the folders visible to my own cloud users (and DSM users). And I would like own cloud to sync to the folders on my NAS to be able to perform backups to this folder.
e.g I assigned drwxrwx— 12 admin users 4096 Apr 19 13:32 oc-external with the result that I can assign that directory to a certain user (shown with the green tag in the external storage app). The folder ist shown and synced with oc. But if I create a subfolder A with the same settings it will show up with the red tag.
I am struggling to find out the correct settings.
Would there be a chance to do these settings in DSM? I did not find out where to do.
Any idea would be appreciated
/Peter
Hi,
The setup you describe works for me without issues.
Here is roughly the setup:
– Ensure users have access to the shared NAS folder desired
– Ensure users have WebDAV enabled in ‘Users Applications’ -section
Add your external mounts to Owncloud with following
– External Storage WebDAV
– Username & Password
Folder location based on need for user:
All folders root (modify webdav port if you have changed the Synology default):
– http://localhost:5005
– Nothing configured in ‘Remote folder’
Some specific root folder:
– http://localhost:5005
– Remote folder: [Shared folder]
Some specific sub-folder:
– http://localhost:5005
– Remote folder: [Shared folder/sub-folder]
Hope this helps.
/Juha
Dear Juha,
all works fine now.
Many Thanks for Your support!
/Peter