

Owncloud is among the best things the open-source communities have produced. This guide will have detailed instructions for installing Owncloud 9 to Synology NAS device with DSM 6.
Some prewords:
- At the time of this guide, DSM 6 is release candidate (rc) version
- This is fresh install – no upgrade from existing owncloud version. If you are planning to do upgrade, please see my other blog post about Owncloud upgrade procedure and the things you should consider when doing the upgrade.
- DSM 6 allows sudo to other users (root, http) in ssh terminal (with NAS admin password), it just makes many things easier (thanks Synology!)
- I will be installing owncloud manually, so no synocommunity packages or install procedure is used
- It is possible to install Redis server and php extension php-redis to your Synology NAS, in order to support file locking in owncloud. Please see my other blog post for installing phpredis into Synology NAS.
- I’m assuming that you have enabled web station, SSH, installed PHP and Mariadb/phpMyAdmin and know what is Apache – in your Synology NAS. I’m also using scripts to automate permission assignments in SSH terminal sessions.
- If you haven’t hosted any websites in your NAS earlier, please enable webstation package and test that PHP websites are working in your setup – through WAN 0r LAN, depending what are your plans on owncloud usage. As minimum requirement use phpinfo() or similar PHP powered web page before jumping into Owncloud installation. This ensures you have your firewalls, web servers, virtual hosts etc. configured correctly.
- My web root in this example is located in: /volume1/web/
- If you have it in different location, please modify any scripts or examples given here accordingly.
Ok -let’s get started with the installation.
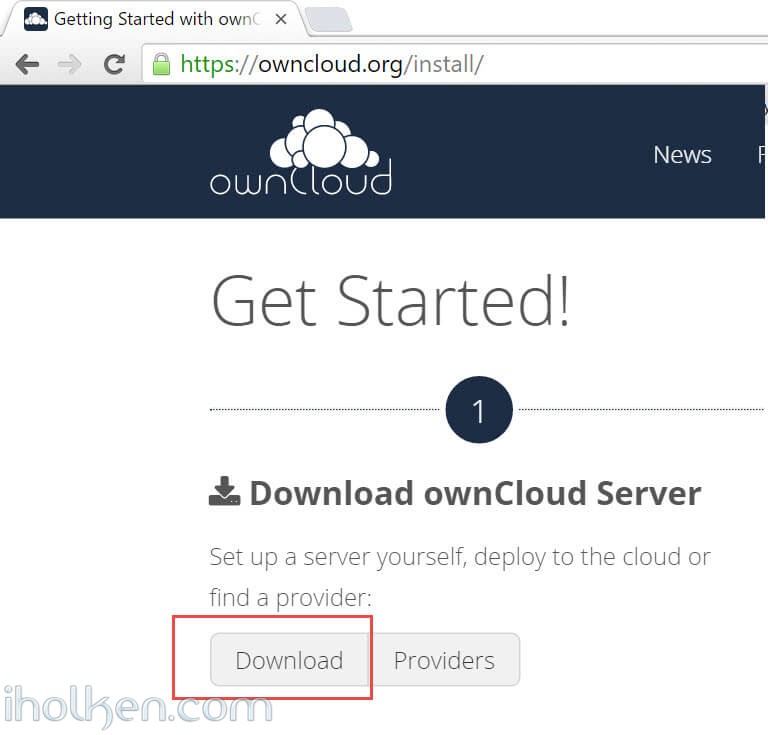
1) Download the latest stable ZIP file from owncloud.org (https://owncloud.org/install/) and copy extracted Owncloud folder to your Synology web root.
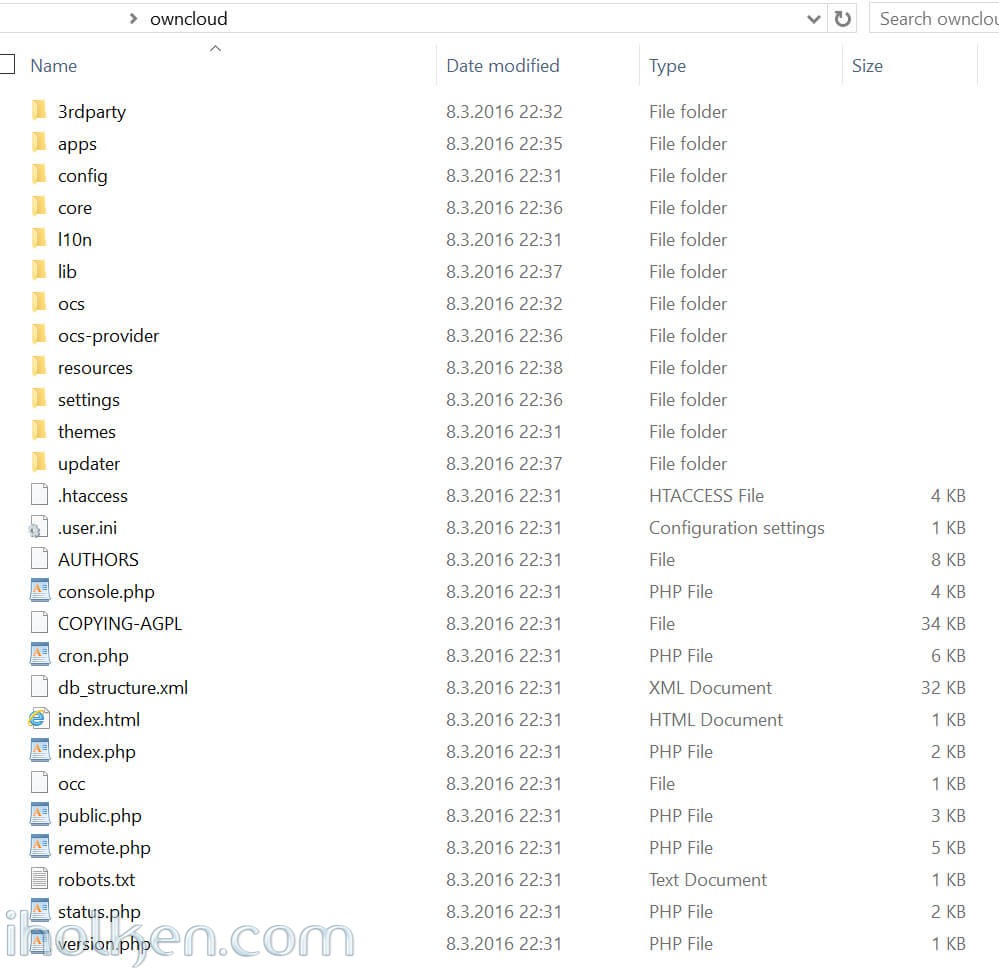
And here is the folder structure how it should look in ‘/web/owncloud/’:
 2) Create empty owncloud data folder outside web folder, as recommended by Owncloud community (I created it at: /volume1/owncloud/)
Note: If you decide to take this recommendation and setup your Owncloud data folder outside the web folder (makes upgrades, backups etc. easier) – you have to make some additional configurations to your PHP settings in Synology admin UI. However – these changes are valid only if you want to access your Owncloud through Synology hosts from the WAN side.
There are 2 options to make the change required (otherwise php/Owncloud instance cannot access your data folder outside web folder):
Option a)
Append your PHP open_basedir configuration with the location of your Owncloud data folder (IF outside web folder): ‘:/volume1/owncloud’
(Note: Do not delete any existing paths, add it to the end of the existing configuration – see screenshot)
Synology Admin UI -> Main Menu -> Web Station -> PHP Settings ->
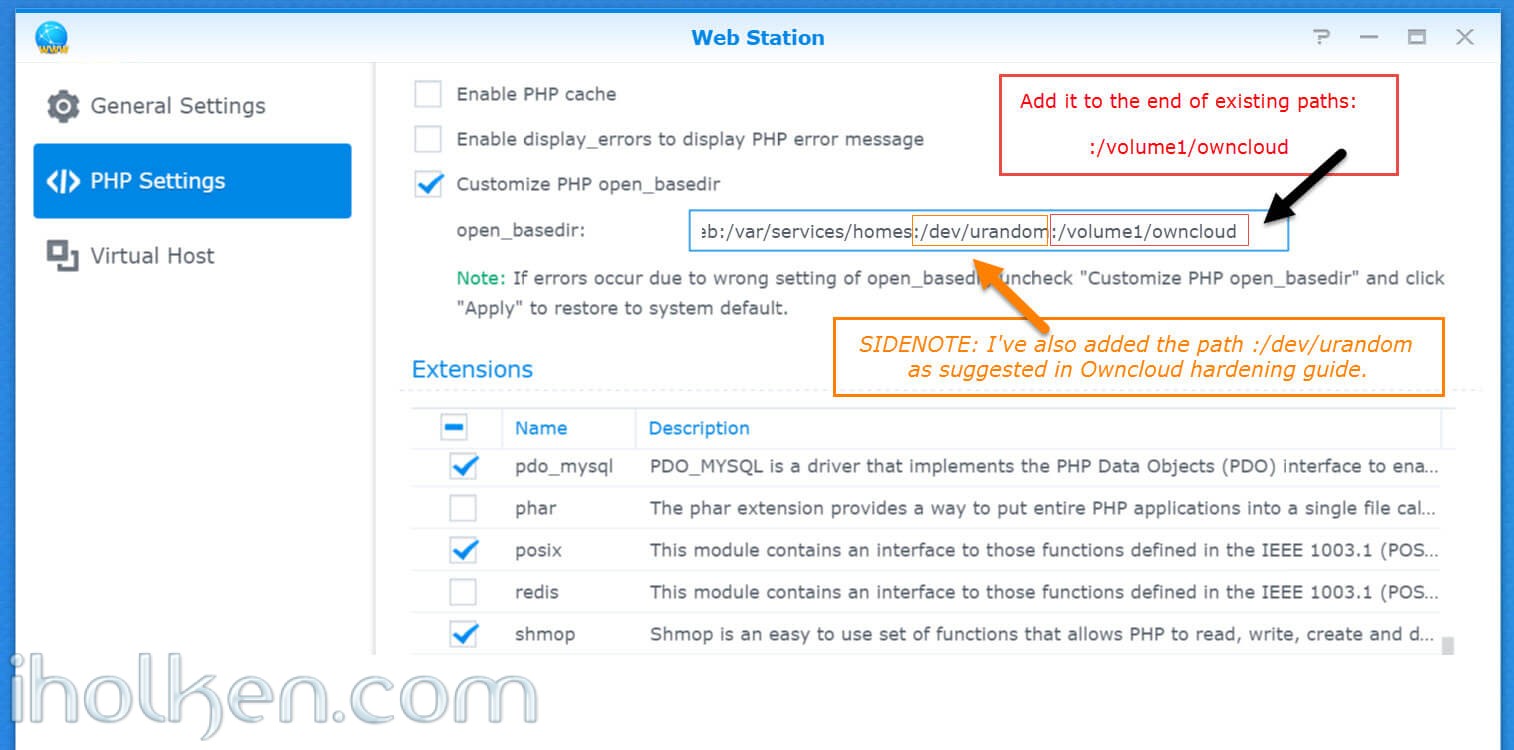
If you choose option a – it is highly recommended in Owncloud hardening guide to update path [/dev/urandom] there also, see for the example in the provided screenshot above. Based on my personal experience, I’ve also disabled PHP cache here and I’m using Redis server for Owncloud caching.
OwnCloud uses a RFC 4086 (“Randomness Requirements for Security”) compliant mixer to generate cryptographically secure pseudo-random numbers. The random number generation also tries to request random numbers from /dev/urandom, thus it is highly recommended to configure your setup in such a way that PHP is able to read random data from it.
Option b)
Clear the whole open_basedir input box, and while keeping the customize option still checked, apply changes. This will disable global PHP open_basedir execution restrictions completely. You can still assign any site/host specific open_basedir restrictions using the .user.ini files approach in docroot folders for every host required.
This option b where open_basedir is disabled for Owncloud – is actually the recommended approach by Owncloud documentation if Owncloud is running in 32bit environment.
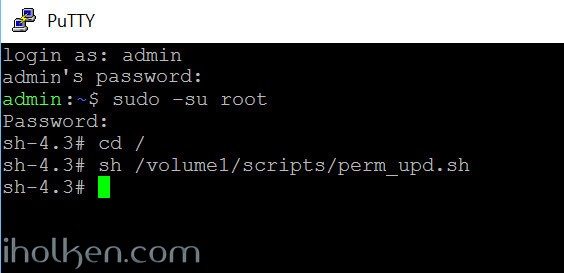
3) Assign following permissions to folders for installation purposes. I run it using a script (.sh) file (remember to execute from system root!), with following contents:
1 2 3 4 5 6 7 8 9 10 11 12 13 14 15 16 |
#!/bin/bash chown -R http:http /volume1/web/owncloud/ chown -R http:http /volume1/web/owncloud/apps/ chown -R http:http /volume1/web/owncloud/config/ chown -R http:http /volume1/web/owncloud/themes/ chown -R http:http /volume1/owncloud/ chown http:http /volume1/web/owncloud/.htaccess find /volume1/web/owncloud/ -type f -print0 | xargs -0 chmod 777 find /volume1/web/owncloud/ -type d -print0 | xargs -0 chmod 777 find /volume1/owncloud/ -type d -print0 | xargs -0 chmod 777 chmod 777 /volume1/web/owncloud/.htaccess |
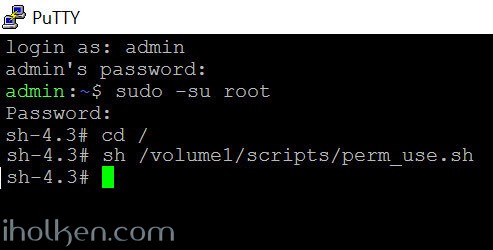
And I’m running it in SSH terminal like this (run it as root as it “can be done in DSM 6″ and from root folder in SSH terminal):
4) Enable Virtual host in NAS for the new owncloud folder in your web root.
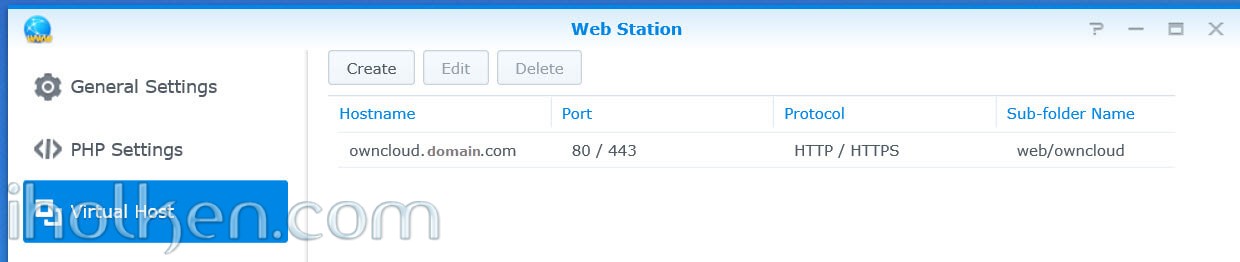
I would highly recommend you choose Apache 2.2 as your webserver for your Owncloud virtual host. Mainly because it works out-of-the-box for most users in Owncloud / Synology NAS setup. Apache 2.4 has been reported not to work in recent comments received from users, and Nginx will require more configuration, especially the re-write rules might prove to be challenging (some users have reported 404 not found error after installation). So just choose Apache…!
5) Double check that you know your Mariadb/MySQL root password – you will need it during owncloud setup/installation.
6) Point your Web browser to the newly created Owncloud website/portal – and finalize installation. Please use the web address that you want to use when using Owncloud, so that during installation your domain will be automatically added to allowed domains in Owncloud config.php file. Please give Admin password and give other details.
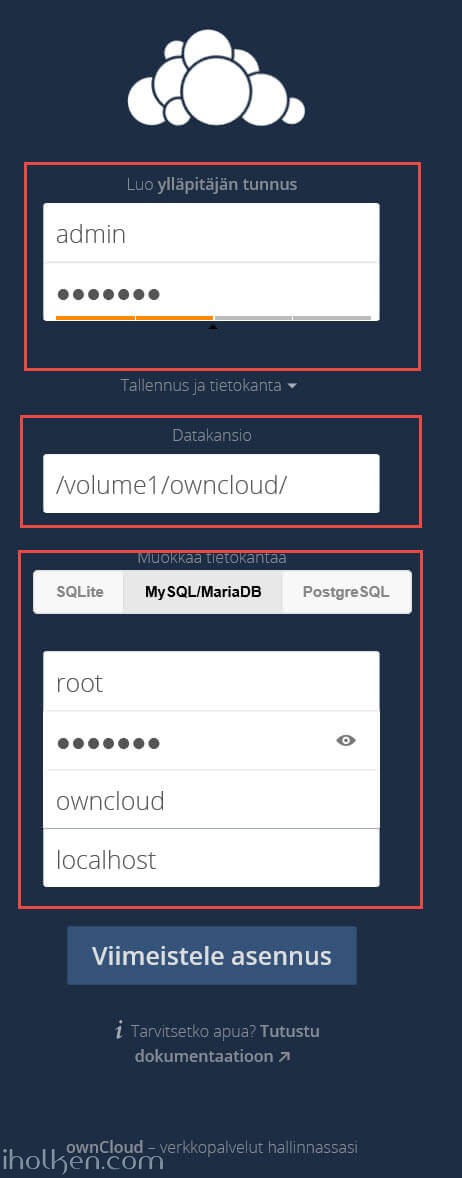
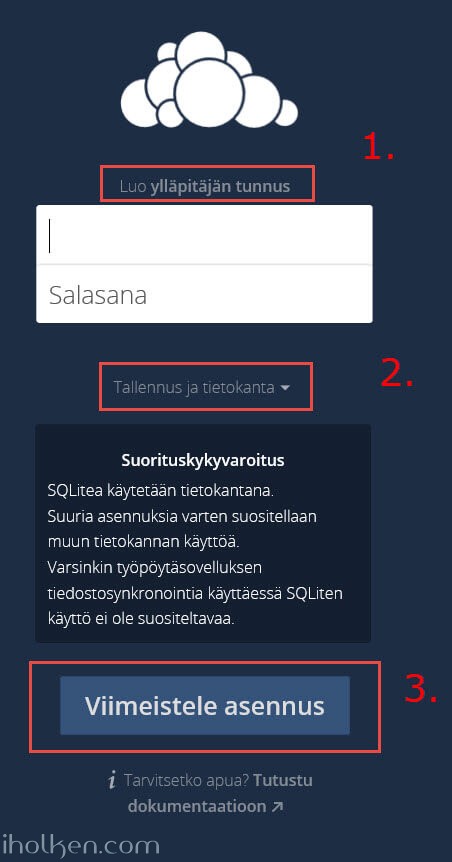 7) Give needed details for installing Owncloud. Highly recommended settings:
1. That you use MySQL/MariaDB – give database details needed
2. Define your Owncloud DATA folder to be outside the Web folder for Owncloud
 8) After installation the Owncloud web interface should open.
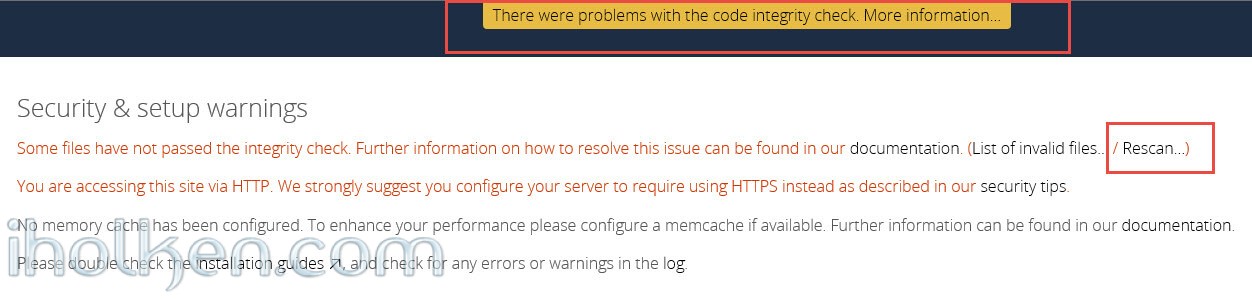
 If you see the error “There were problems with the code integrity check” – this is most likely because Synology creates @eadir cache folders everywhere. Removing these manually from Owncloud folders will remove the error. In this job you might find this code useful:
1 |
find . -name "@eaDir" -type d -print0 | xargs -0 rm -rf |
And here is example on how to use it:
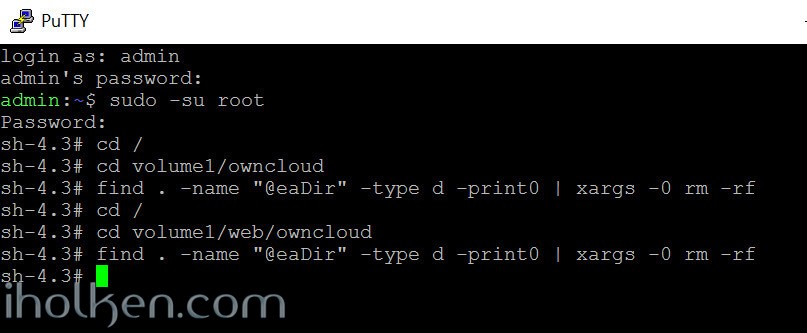
And you have now removed all ‘@eaDir’ folders from owncloud folders. And you should also be able to remove the error by Selecting ‘RESCAN’ on admin page of Owncloud.
 9) After installation you need to assign more strict folder permissions back for Owncloud folders. Please regard the given script as example only – always validate security permissions for your needs as required – and review related documentation from Owncloud.org for version 9.
I use a script (.sh) file, with following contents:
1 2 3 4 5 6 7 8 9 10 11 12 13 14 15 16 17 18 |
#!/bin/bash chown -R root:http /volume1/web/owncloud/ chown -R http:http /volume1/web/owncloud/apps/ chown -R http:http /volume1/web/owncloud/config/ chown -R http:http /volume1/web/owncloud/themes/ chown root:http /volume1/web/owncloud/.htaccess chown root:http /volume1/owncloud/.htaccess find /volume1/web/owncloud/ -type f -print0 | xargs -0 chmod 0640 find /volume1/owncloud/ -type f -print0 | xargs -0 chmod 0640 find /volume1/web/owncloud/ -type d -print0 | xargs -0 chmod 0750 find /volume1/owncloud/ -type d -print0 | xargs -0 chmod 0750 chmod 0644 /volume1/web/owncloud/.htaccess chmod 0644 /volume1/owncloud/.htaccess |
And I’m running it in SSH terminal like this (run it as root as it “can be done in DSM 6″ and from root folder in SSH terminal):
If you want to be able to edit the ‘max upload size’ section in Owncloud admin area, you might want to consider also having following permissions in place (upload size is overrided in hidden ‘.user.ini’ file in Owncloud root):
1 |
chown http:http /volume1/web/owncloud/.user.ini |
This makes the file writable by ‘http’ user, thus editable in Owncloud admin section.
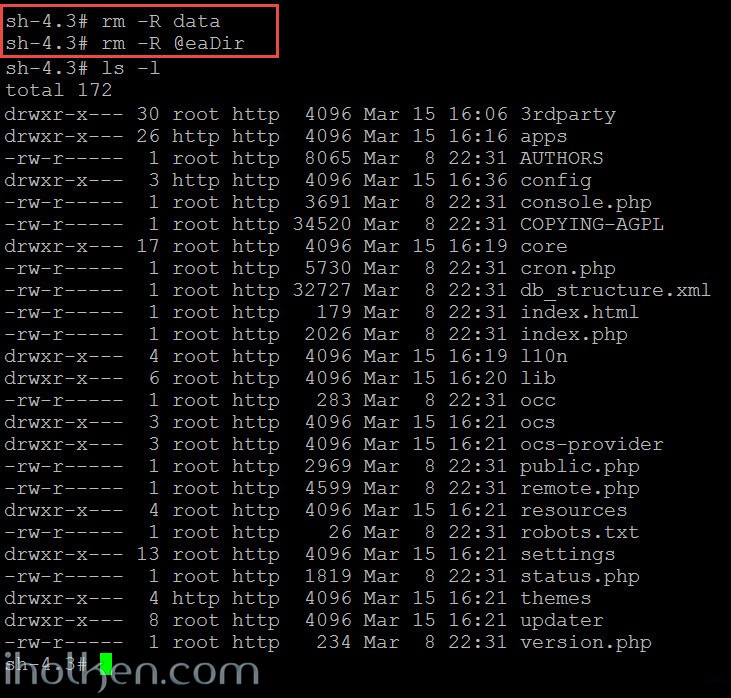
10) Double check that permissions got assigned correctly. You can also safely remove ‘data’ and ‘@eaDir’ folders inside ‘/web/owncloud/’ – they are not needed inside there if you created data folder outside the web folder as instructed:
 11) Done – You have successfully installed Owncloud 9 to your Synology NAS.
 Please follow closely Owncloud.org and Owncloud Github for further configuration, setup and any other topical issues. There are million things still to configure in your Owncloud setup including config.php modifications etc.
 Note: It is possible to install Redis server and php extension php-redis to your Synology NAS, in order to support Redis caching and file locking in owncloud. Please see my other blog post for installing phpredis into Synology NAS running DSM6 without bootstrapping. Also I have posted a guide on how to configure Owncloud to use system CRON in Synology NAS (DSM 6 RC).
(update 28.3 2016 – cleaned permission scripts and made addition about PHP open_basedir config required if data folder outside Owncloud web folder)
(update 13.6 2016 – Updated Apache as the preferred webserver for the virtual host configuration in Synology NAS. Mainly because Apache works out-of-the-box. Nginx actually requires more configuration – especially the re-write rules may cause headache and 404 not found -errors.)
(update 14.2 2017 – Updated Apache 2.2 as the preferred webserver version for the virtual host configuration in Synology NAS, due to multiple users reporting issues when using Apache 2.4 with latest Owncloud and DSM versions.)

Juha Ketola


SO how i fixed it
added to /etc/php/php.ini
extension = gd.so
extension = intl.so
then
cp /volume1/@appstore/PHP5.6/usr/local/lib/php56/modules/gd.so /usr/lib/php/modules/.
cp /volume1/@appstore/PHP5.6/usr/local/lib/php56/modules/intl.so /usr/lib/php/modules/.
i know get the right response
root@homenas:/# sudo -u http php /volume1/web/owncloud/occ user:resetpassword admin
Enter a new password:
Confirm the new password:
Successfully reset password for admin